
Compatibility
Minecraft: Java Edition
Platforms


Links
Tags
Creators
Details

ScreenEffects by Trplnr
A small flexible library for showing animated screen overlays to the user.
Demo
Usage
Making Screen Effects using the builder Deno file:
IMPORTANT: Using this method requires the following to be installed in your system: Deno, ffmpeg. After getting those, restart your computer.
A screen effect is composed of multiple font frames that the datapack uses to show the animation.
A utility Deno JS file is provided with the resource pack inside the screen_effects folder to make this process easier.
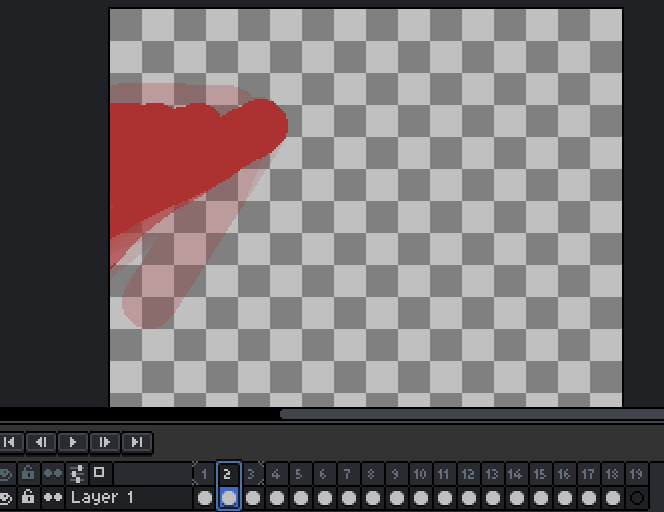
1. Making the animation
NOTE:
- You can use any image editing software you like as long as it can export your animation into a spritesheet. Aseprite has this functionality.
- It is recommended to make a 256x256 .png file for the best results.
- Start by creating an animation.
- Export your animation into a vertical spritesheet inside the
screen_effectsfolder.

- You can add more spritesheets inside the
screen_effectsfolder if you want more screen effects.
2. Building the animations
- To prepare for building the animations, go inside the
buildScreenEffects.jsfolder and adjust these configs.
// -------------CONFIGS---------------
// Replace with the namespace you use!
const NAMESPACE = "trplnr";

// If you want the font JSON files to be formatted, make this boolean true.
const prettyPrintFontFiles = false;

// If you want to see the ffmpeg logs, make this boolean true.
const showFFMPEGLogs = false;
// -----------------------------------
- To make your amazing animations usable by the datapack, You can run a command in your terminal to convert your spritesheets into frames!
- Open your preferred terminal and make sure you are inside the
screen_effectsfolder. - After that, run this command
deno run --allow-all .\buildScreenEffects.js

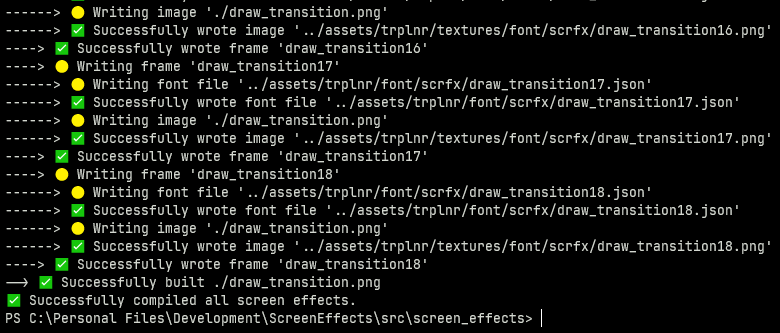
- After running that, if everything is successful, it should look like this:
-
Congrats! You've successfully turned your wonderful animations into frames! :tada:
-
If you only want to to compile 1 spritesheet, simply run
deno run --allow-all .\buildScreenEffects.js filename.png
Registering the Screen Effects
The datapack needs to have data to know what a screen effect is so you have to register it.
Here is an example on how you can register one.
ScreenEffect schema shown below this section.
# To add your own screen effects to the global registry,
# simply copy what is shown here.

data modify storage example:scrfx_data screen_effects set value { \
   "examples:toast": { \
        tps: 1, \
        frame_count: 31, \
        path: "example:scrfx/exampletoast" \
    }, \
   "examples:transition": { \
        tps: 1, \
        frame_count: 69, \
        path: "example:scrfx/exampletransition", \
        callbacks: { \
            "26": "say This frame covers the whole screen" \
        } \
    }, \
}

function scrfx:add_screen_effects {storage: "example:scrfx_data", path: "screen_effects"}
The ScreenEffect Schema
This is the definition of a ScreenEffect.
{
    /**
     * The name of the screen effect,
     * preferrably namespaced.
     */
    "ns:identifier": {
        /**
         * How fast each frame
         * shows up measured in ticks.
         *
         * Just like fps but well in ticks.
         *
         * Must be above zero.
         */
        tps: <int>,

        /**
         * How many frames are in the animation.
         */
        frame_count: <int>,

        /**
         * The font resource location
         * of the animation with the
         * number at the end removed.
         */
        path: <resource_location>,
        /**
         * Defines what commands run in a certain frame.
         *
         * Optional.
         */
        callback?: {
            "<frame_number>": "<command>",
            ...
        }
    }
}
Running the Screen Effects
- Declare the animation to be played inside the
scrfx:in idstorage. - Then execute as a player and run
scrfx:play!
Example:
data modify storage scrfx:in id set value "ns:identifier"
execute as Trplnr run function scrfx:play
- You have successfully played a screen effect! 🎉