
Compatibility
Minecraft: Java Edition
Platforms
Supported environments


Creators
Details
Logo
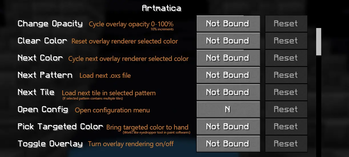
Usage Instructions 1: Set Keybinds
Usage Instructions 1: Set your keybinds. The only required keybind to start using Artmatica is "Open config" (Default: N).
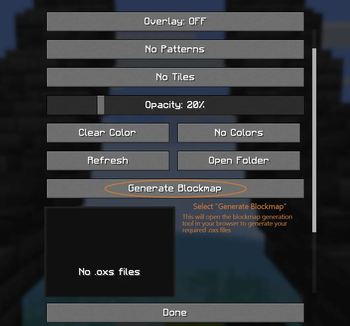
Usage Instructions 2: Open Generator
Usage Instructions 2: Open Generator. Open your config menu (Default keybind: N) and select "Generate Blockmap". This will open the blockmap generation tool in your web browser
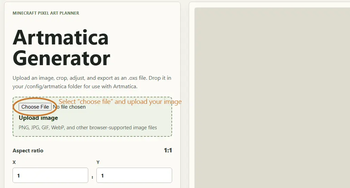
Usage Instructions 3: Select and Upload an Image
Usage Instructions 3: Select and Upload an Image to the blockmap generator. This can be in any browser-supported image format.
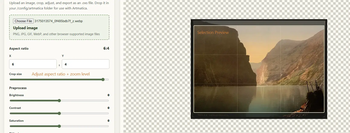
Usage Instructions 4: Set Aspect Ratio and Zoom
Usage Instructions 4: Set Aspect Ratio and Zoom. You will be able to see a preview of your selection box on the image preview. NOTE: The aspect ratio is the exact number of canvases that will be used to make up the image.
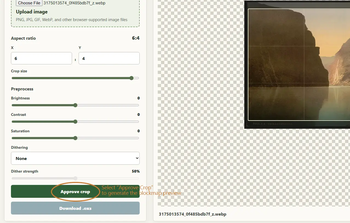
Usage Instruction 5: Approve Crop
Usage Instruction 5: Select the "Approve Crop" button. This will convert your selection to the ArtMap plugin's color palette, as well as adjust the image to fit your canvas-based aspect ratio
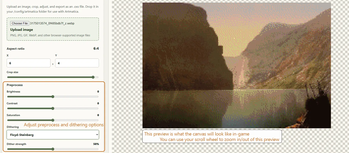
Usage Instructions 6: Adjust Preprocess Settings
Usage Instructions 6: Adjust Preprocess Settings. These will be viewable in real-time on the preview as you adjust them to your liking.
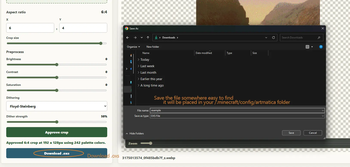
Usage Instructions 7: Save the .oxs File
Usage Instruction 7: Save the .oxs File to a location you will be able to find later. This will be placed in your /config/artmatica folder
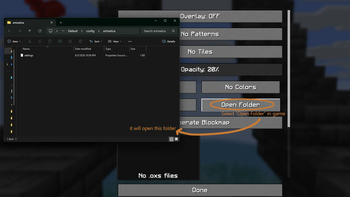
Usage Instructions 8: Open Artmatica Folder
Usage Instructions 8: Return to game, and click the "Open Folder" button to open your artmatica folder
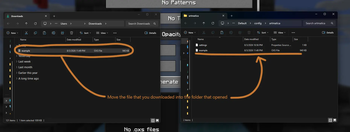
Usage Instructions 9: Move the .oxs File to Artmatica Folder
Usage Instructions 9: Move the .oxs file that you downloaded into the /config/artmatica folder that you just opened via the "Open Folder" button
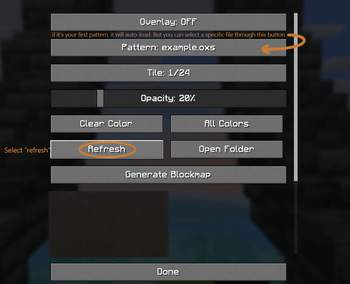
Usage Instructions 10: Refresh Artmatica
Usage Instructions 10: Refresh Artmatica. Click the "Refresh" button to re-scan your /config/artmatica folder for new files. If it's your first file, it will be auto-selected.
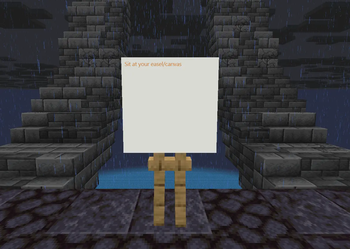
Usage Instructions 11: Sit at Easel/Canvas in-game
Usage Instructions 11: Sit at an easel/canvas in-game
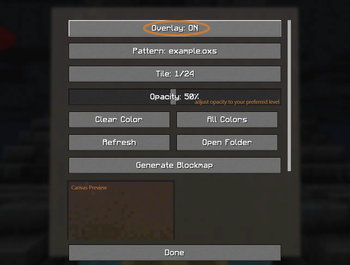
Usage Instructions 12: Turn Overlay On
Usage Instructions 12: Re-open the config screen, and turn your overlay on. Adjust opacity until you're able to comfortably see it in the preview
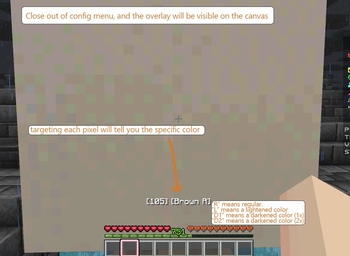
Usage Instructions 13: Begin Painting
Usage Instructions 13: Exit out of the config screen. You should now be able to see the blockmap guide over the canvas!
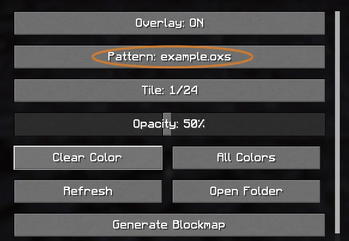
Patterns Info 1
Click this button to view the list of currently installed patterns (Make sure to click "Refresh" first)
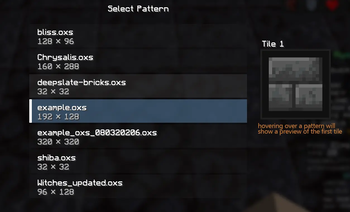
Patterns Info 2
In the "Select Pattern" screen, you are able to select a pattern to use (loaded via .oxs file). Hovering over a pattern will show a preview of the first tile of it
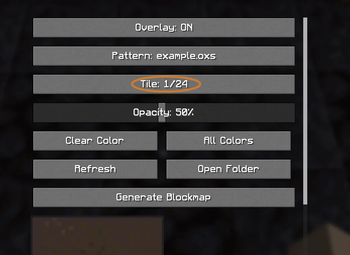
Tiles Info 1
On patterns that use multiple tiles, click this button to open the tile selection screen
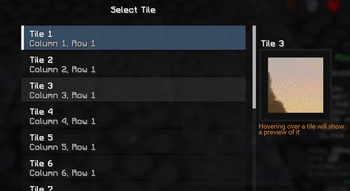
Tile Info 2
In the "Select Tile" screen, you are able to select a different tile for the current pattern. Hovering over a tile will show a preview of it.
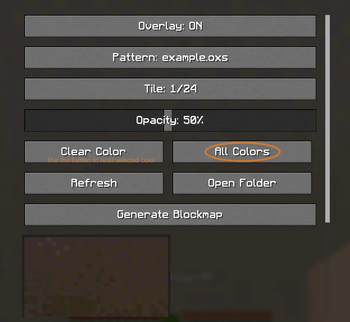
Color Selection Info 1
Press the "All Colors" button in the Config Menu to view the color list for the current tile. If a color is already selected and you would like to view all colors again, you can select "Clear Color"
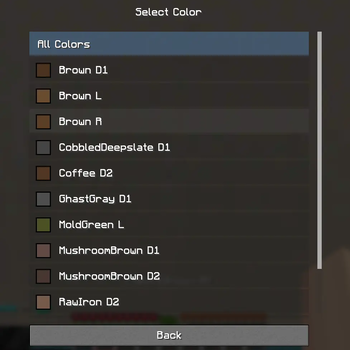
Color Selection Info 2
In the "Select Color" screen, you can pick a specific color to only be rendered in the overlay.
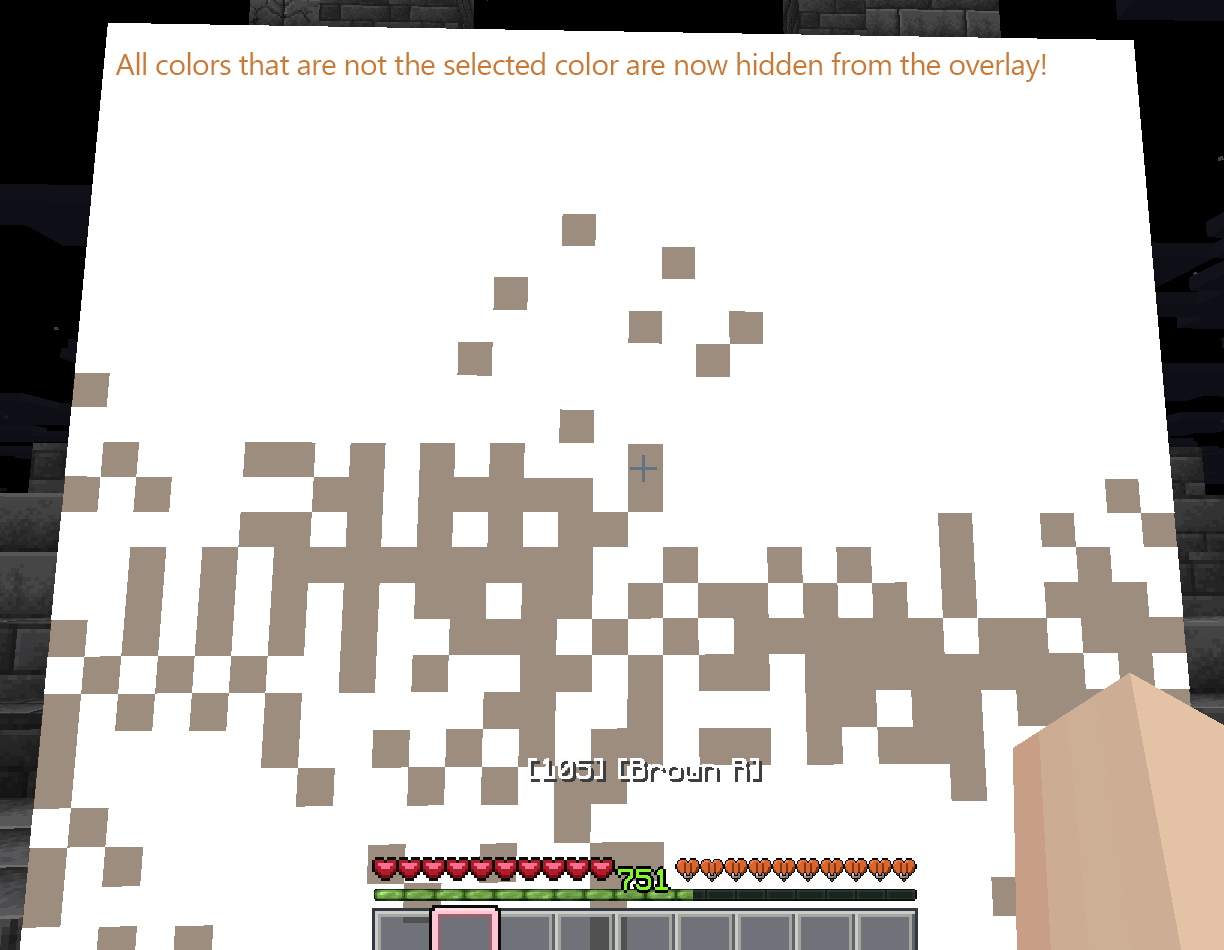
Color Selection Info 3
After selecting a color, you will now only see that color in the overlay. Everything else will be set to be fully opaque and a contrasting color to make working through tiles efficient!