
Compatibility
Minecraft: Java Edition
Platforms
Supported environments


Links
Tags
Creators
Details
MeYuugaos Radio Mod (EN_US)
I've spent the last month working on this mod, and I'm so stoked to finally share it! This project is inspired by the Dragon's Radio mod and is made for the new versions of Minecraft (1.17.1-1.21.10). The mod can play HLS AAC audio streams (.m3u8).
Required
• FFmpeg
Optional
• Mod Menu
Links
• ModRinth
• Issues
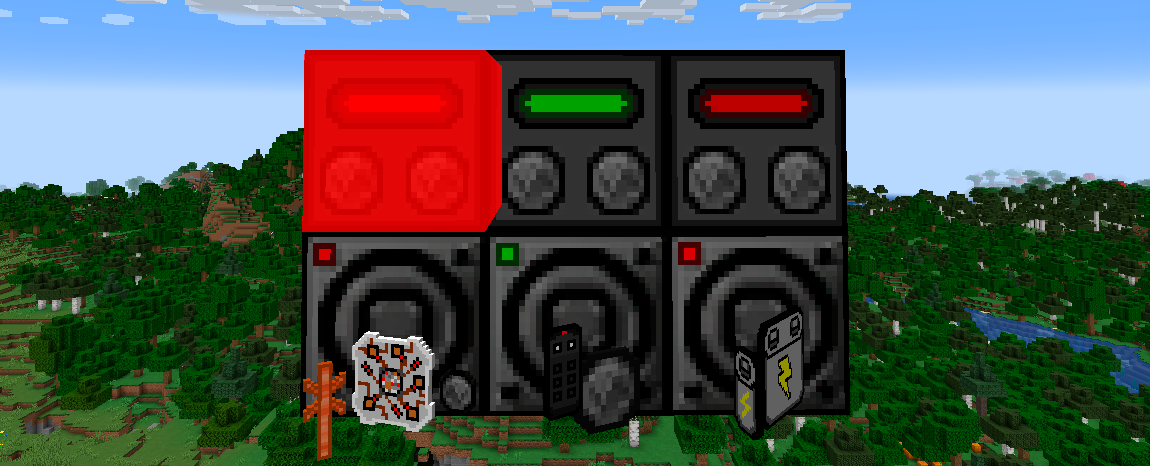
Gui
Radio

• A status switch (on/off).
• A text field for audio stream URL.
• A volume slider.
Speaker

• A status switch (on/off).
• A volume slider.
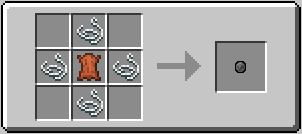
Receipes
Blocks
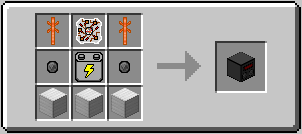
1. Radio - the most important block, the source of the sound and signal for the speakers.
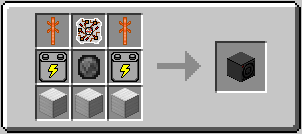
2. Speaker - the second most important block, which receives a signal from the radio and plays loud enough for the whole world to know your musical tastes.
Items
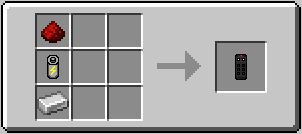
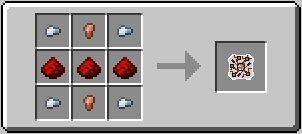
1. Remote controller - used to control the radio and the speaker: turning the radio and speaker on/off, binding/unbinding a speaker, changing the volume of the radio and speaker, changing the audio stream link.
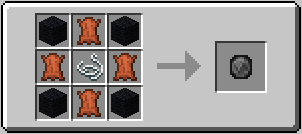
2. Electronic circuit - used to create the radio and the speaker.
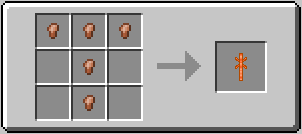
3. Antenna - used to create the radio and the speaker.
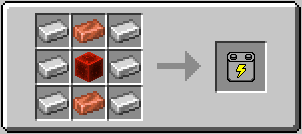
4. Battery - used to create the radio and the speaker.
5. Small battery - used to create the remote controller.

6. Membrane - used to create the speaker.
7. Small Membrane - used to create the radio.
Functionality
Remote controller charging
To charge the remote controller, press SHIFT + RMB on a charged radio with the remote controller in the main hand.
Opening radio and speaker gui
To open the radio and speaker GUI, press LMB on the block with the remote controller in the main hand.
Radio control
To set the audio stream URL, click on the main text field and paste the URL, then turn on the radio by pressing the power switch.
To adjust the volume, drag the volume slider using your mouse or enter the desired volume level manually using your keyboard.
Speaker control
To turn on the speaker, press the power switch.
To adjust the volume, drag the volume slider using your mouse or enter the desired volume level manually using your keyboard.
Speaker binding
To bind a speaker, press the RMB with the charged remote controller in the main hand first on the radio you want to link the speaker to, and then on the speaker you want to bind.
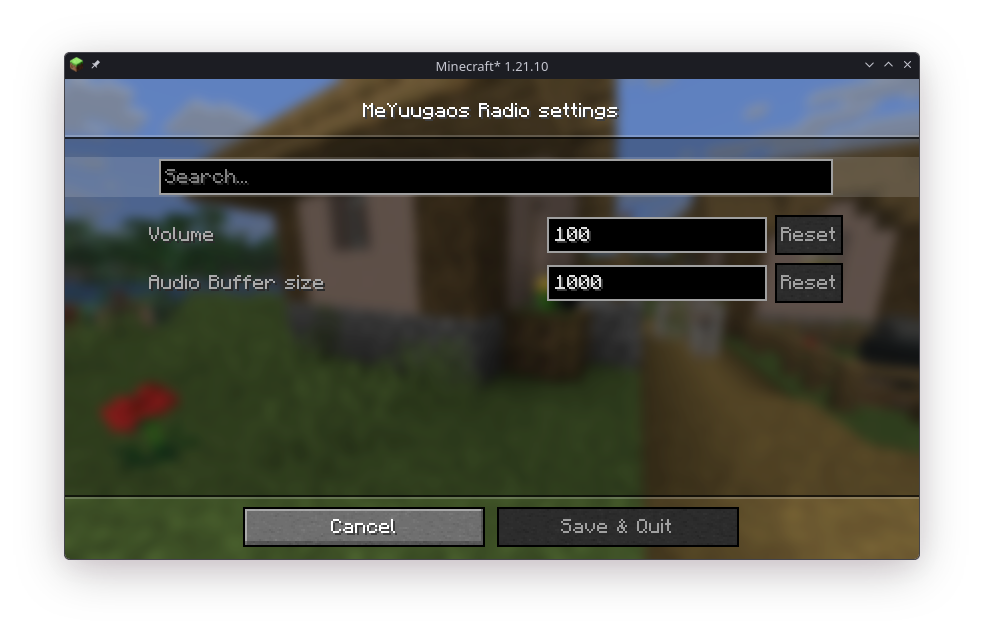
Settings (Mod Menu required)
Using the Mod Menu, you can adjust the overall volume of all radios and speakers.
Since 1.1.0 you also can change the audio buffer size. Smaller = faster response, larger = more stable.
Notes
An unlimited number of speakers can be connected to a single radio.
The maximum distance at which a speaker can be connected to a radio is determined by the gamerule named "meyuugaosradioConnectRadius", which is set to 50 by default.
FFmpeg installing guide (REQUIRED)
You need to install FFmpeg so that the mod can play your radio station's m3u8 stream. To do this, go to this website.
Windows
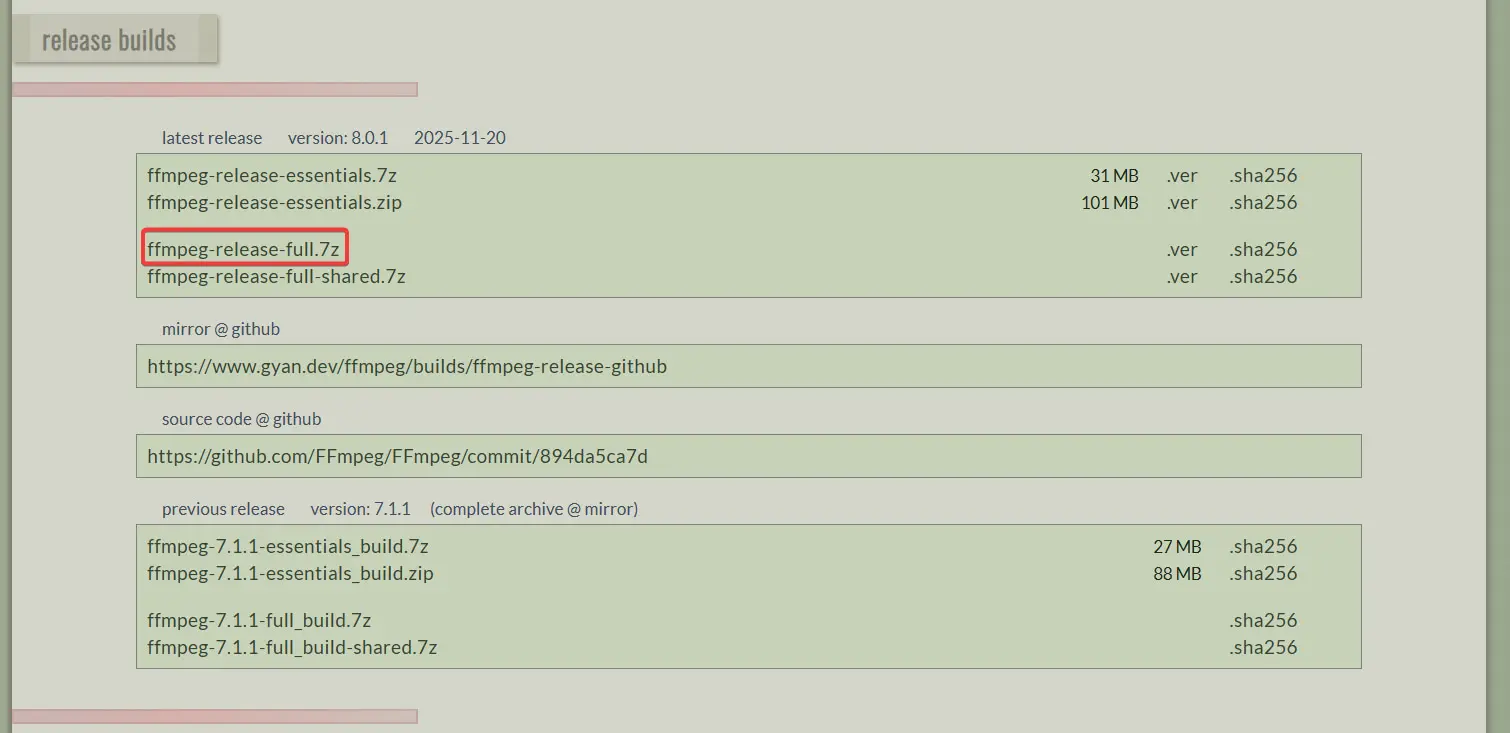
Go to this website and download the latest full release:
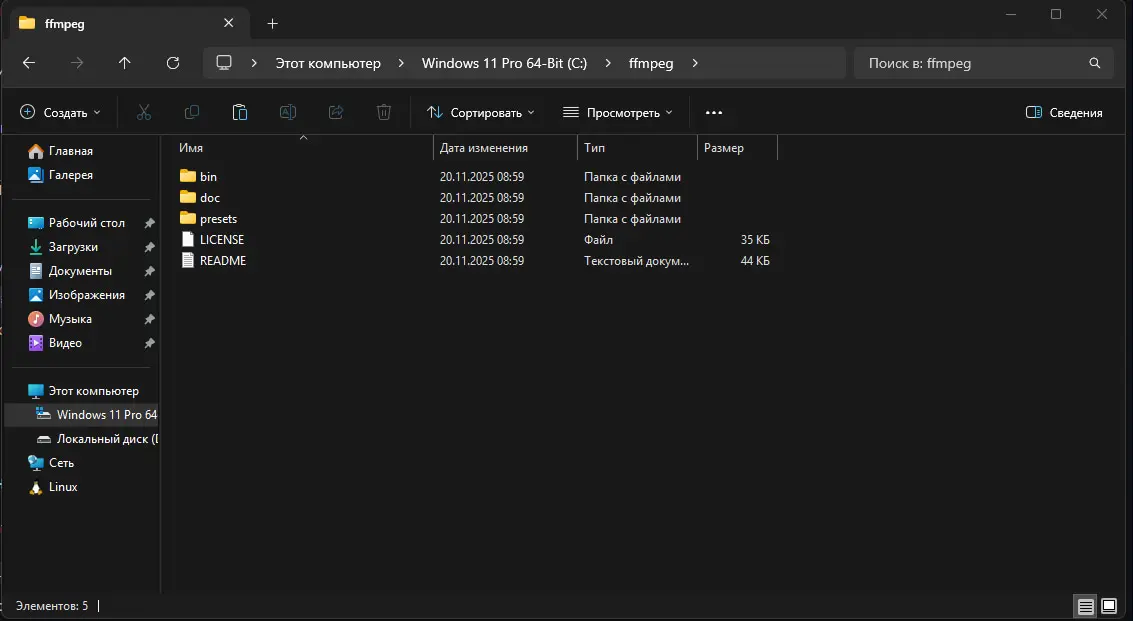
 Unpack the contents of the main folder from the archive into the C:\ffmpeg directory:
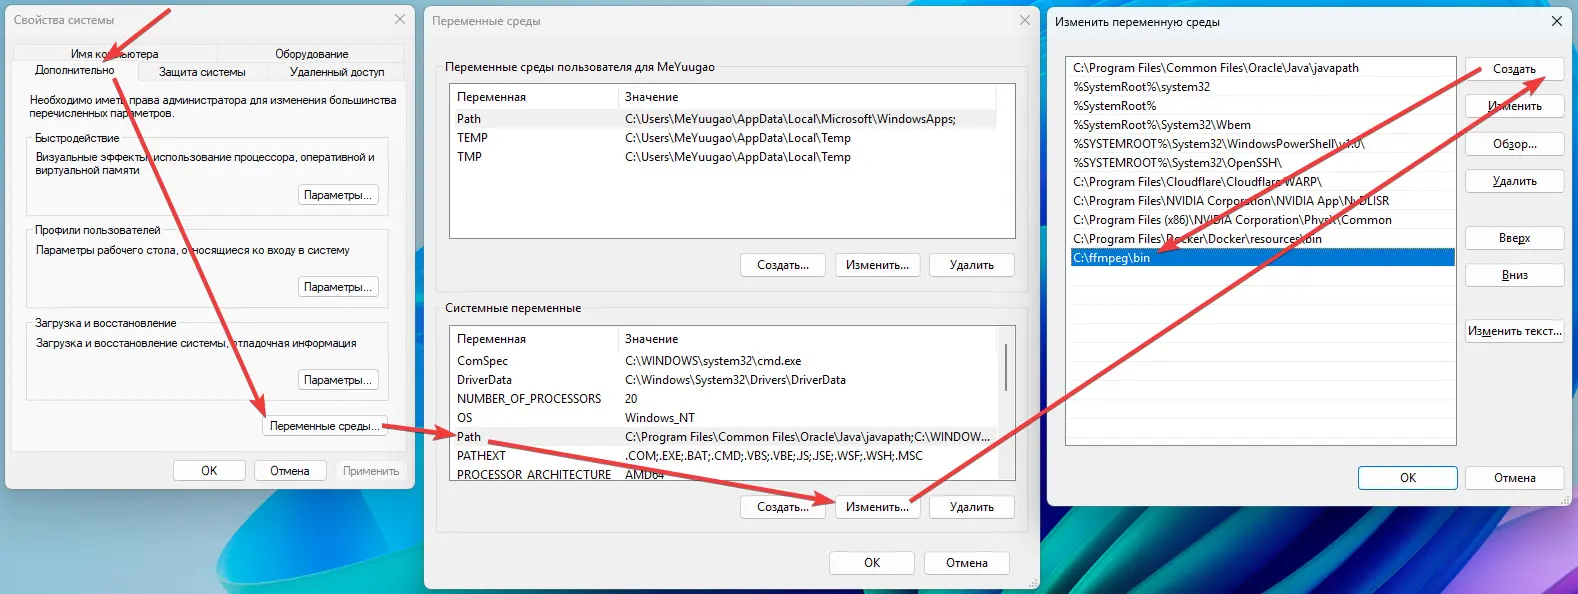
 Create a new environment variable:
Linux
FFmpeg is installed through your distribution's package manager.
For example, sudo apt install ffmpeg (Debian/Ubuntu), sudo dnf install ffmpeg (Fedora/RHEL), or sudo pacman -S ffmpeg (Arch).
AzuraCast installing guide (your personal public radio station)
If you are using Windows, we will use the "WSL" (Windows Subsystem for Linux) tool, which allows you to run Linux distributions in an isolated environment without the need for virtual machines or restarting your PC. If you are using Linux, simply skip the installation of WSL and Docker on Windows.
Installing WSL
First, open powershell as an administrator and run the following command:
wsl --install
Wait for the distribution to download and install, and set a username and password:
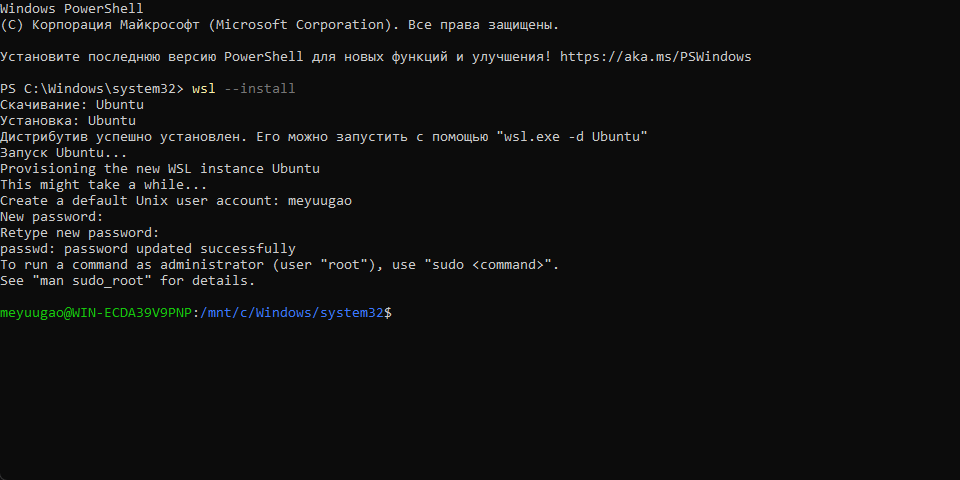
NOTE: in the terminal, when you enter a password, all characters are hidden. You won't see what you're writing.
Installing and configuring Docker, AzuraCast, and localtunnel
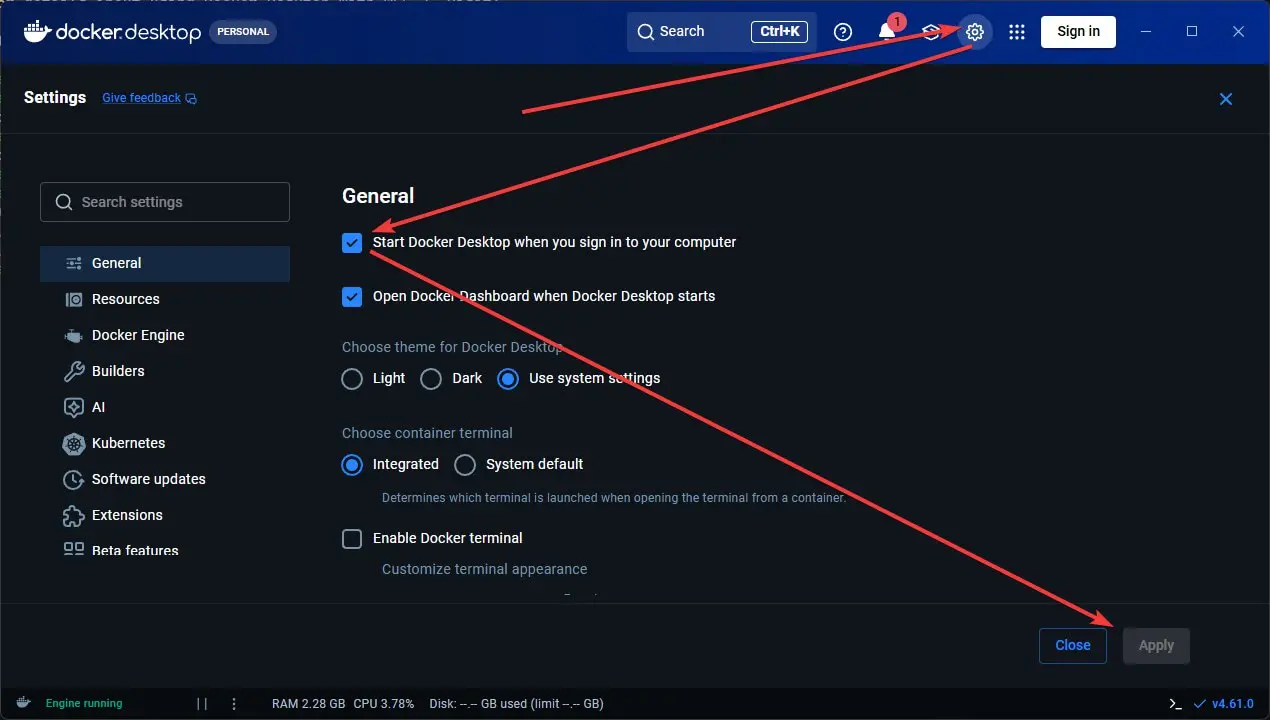
First, install Docker Desktop using this link and enable this setting:
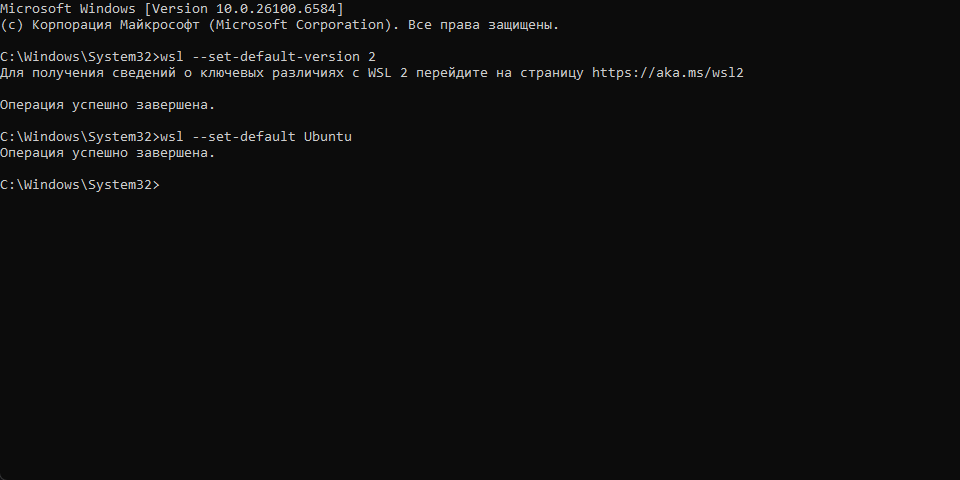
Open cmd as an administrator and enter the following commands one by one:
wsl --set-default-version 2
wsl --set-default Ubuntu
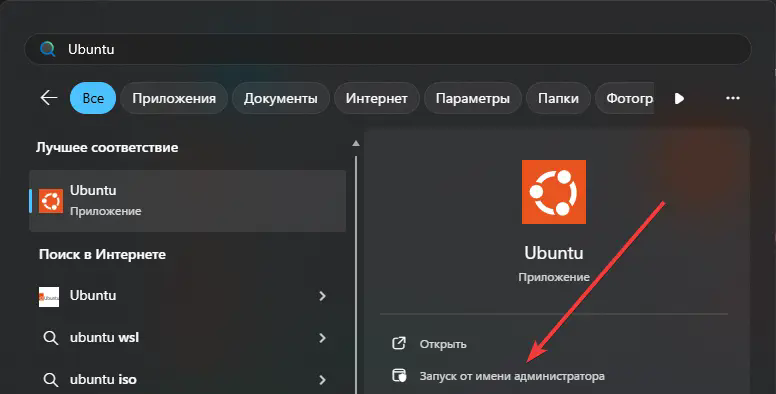
Next, open the Ubuntu terminal:
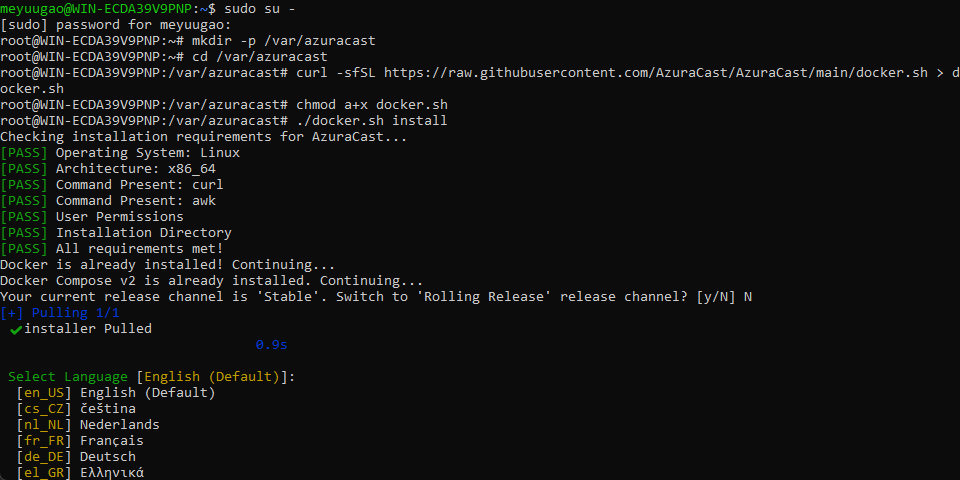
Enter the following commands one by one and follow the installation instructions:
sudo su -
mkdir -p /var/azuracast
cd /var/azuracast
curl /fsSL https://raw.githubusercontent.com/AzuraCast/AzuraCast/main/docker.sh > docker.sh
chmod a+x docker.sh
./docker.sh install
NOTE: replace "/fsSL" with "-fsSL", the site doesn't allow you to write "curl" and "-fsSL" together, so I had to replace '-' with '/'.
NOTE: When asked "You should update the Docker utility script after changing release channels. Should it be updated automatically now?", answer "n".
Now you need to install localtunnel. Without closing the current session, enter the following commands in the Ubuntu terminal one by one:
apt update
apt install nodejs npm
npm install -g localtunnel
Starting and configuring the radio
Launch the Ubuntu terminal and enter these commands one by one:
sudo su -
cd /var/azuracast
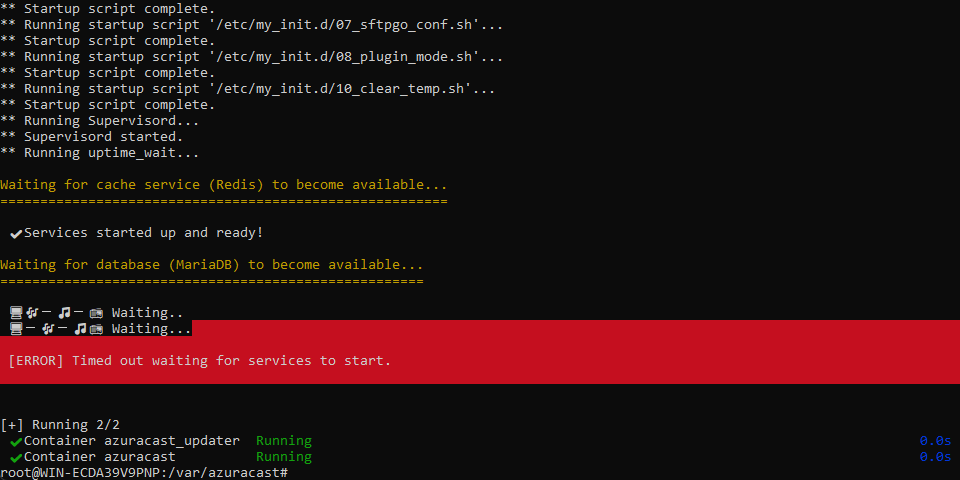
docker compose up -d
lt --port 80
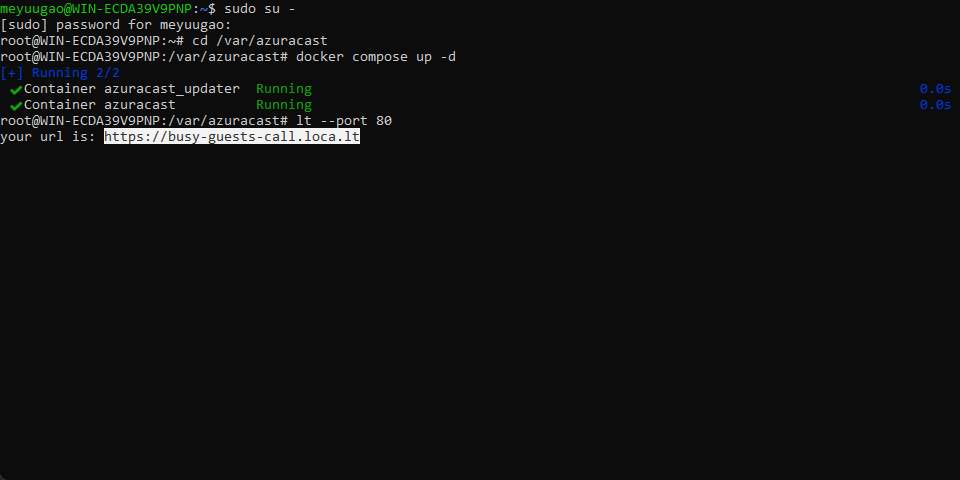
Next, copy the link and click on it in your browser.
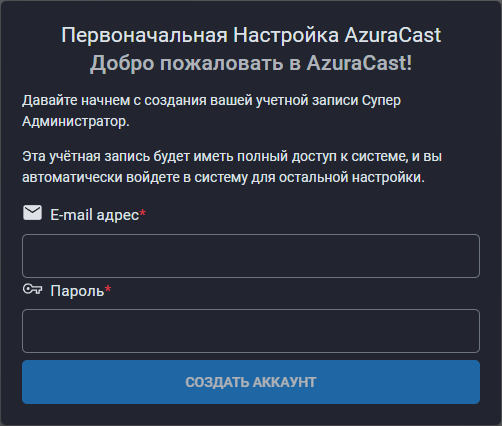
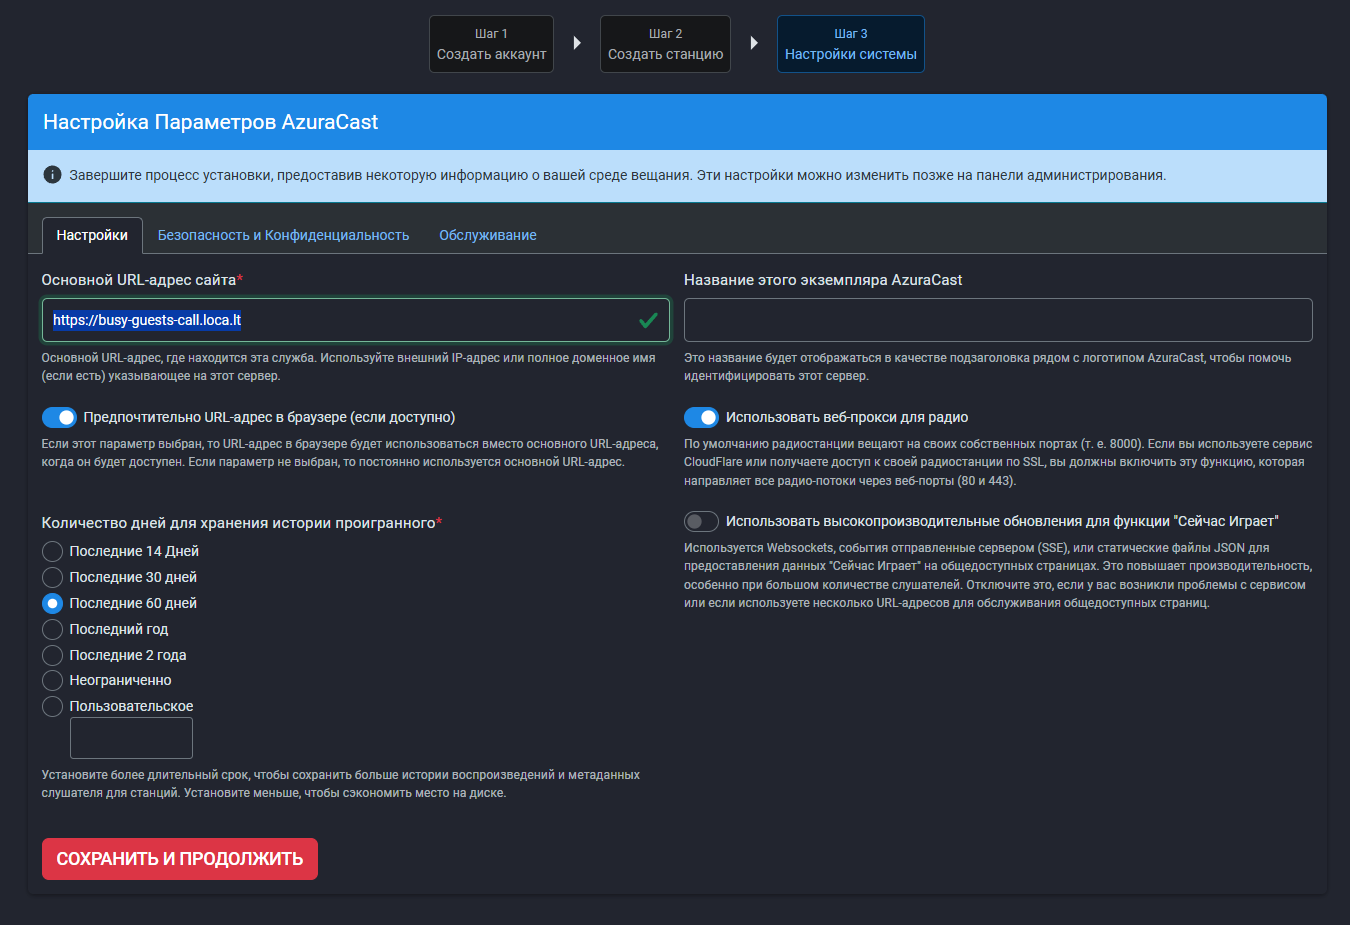
When you first launch the program, you will need to create a super administrator account:
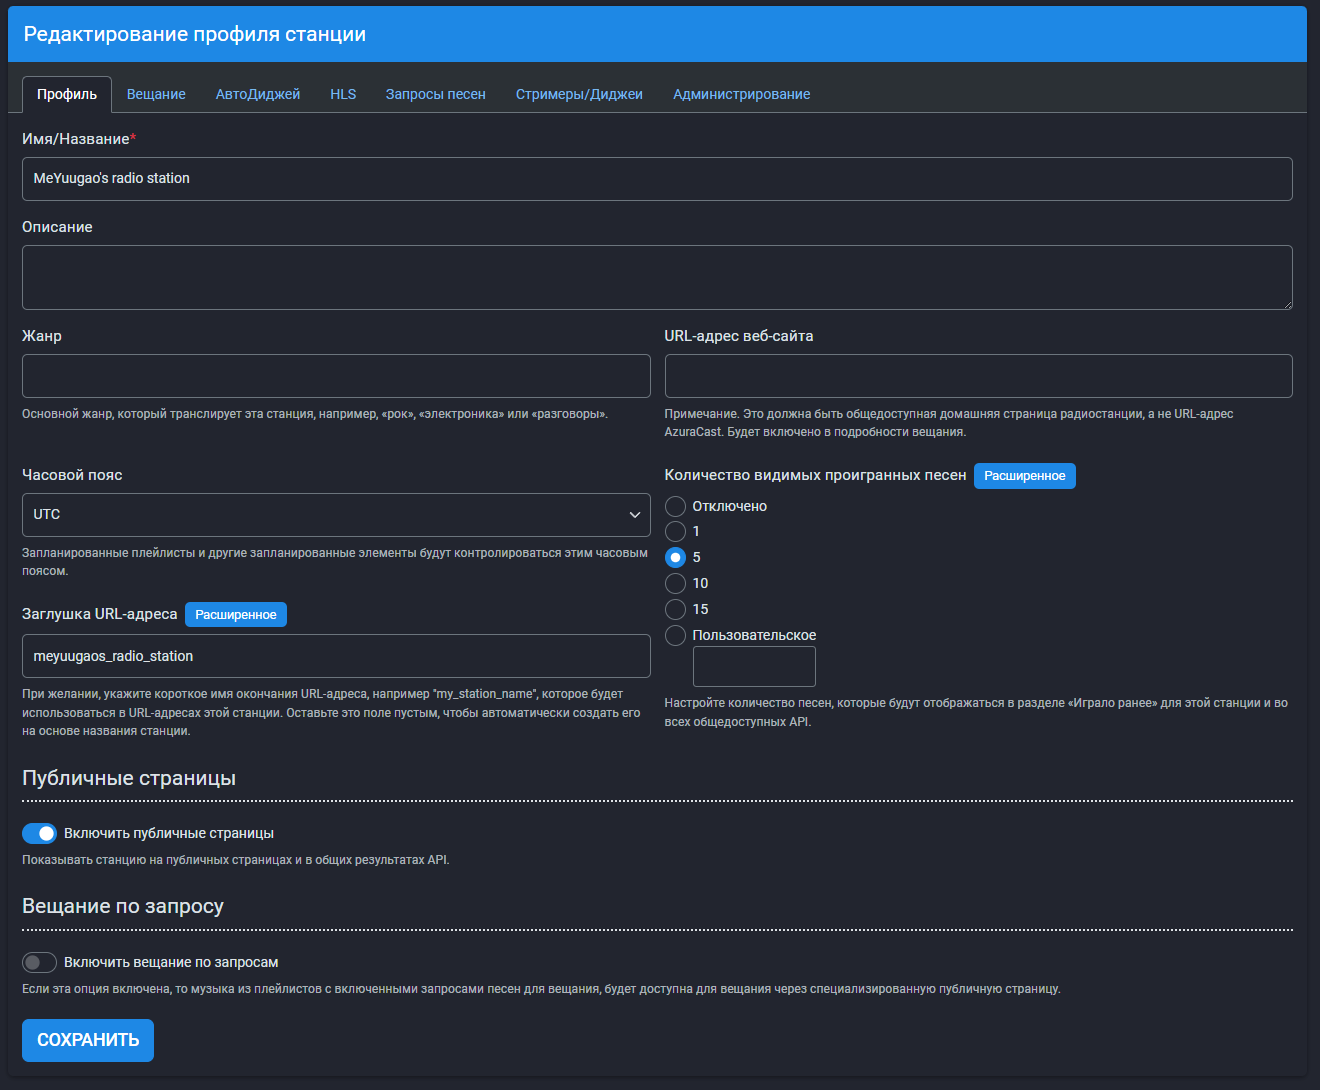
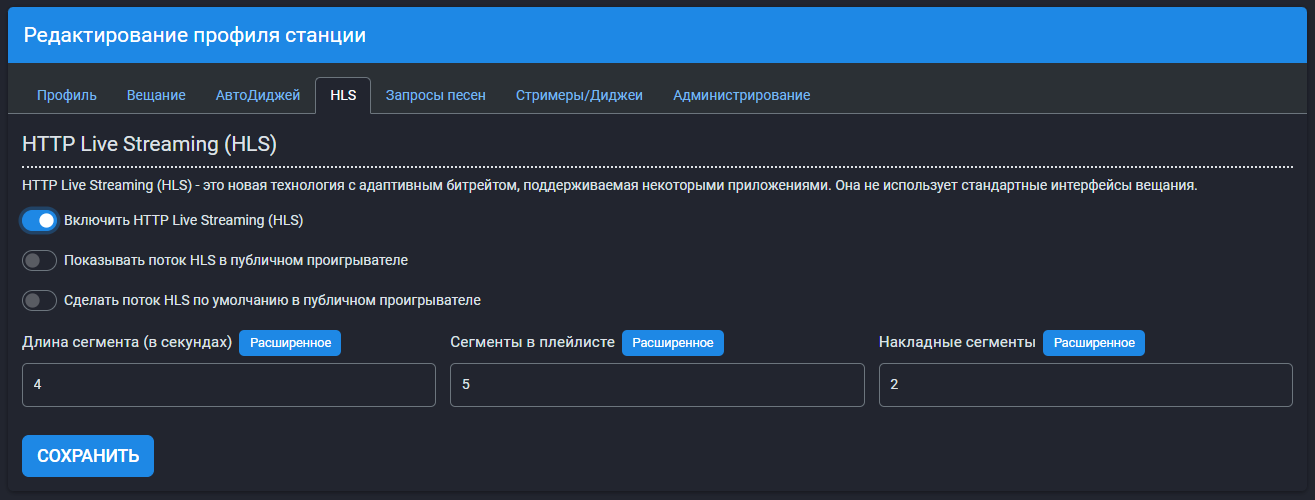
After creating an account, set the name of your radio station, enable HLS, and set the link you copied as the main URL of your site (every time you create a new link, you will need to update it in the settings):
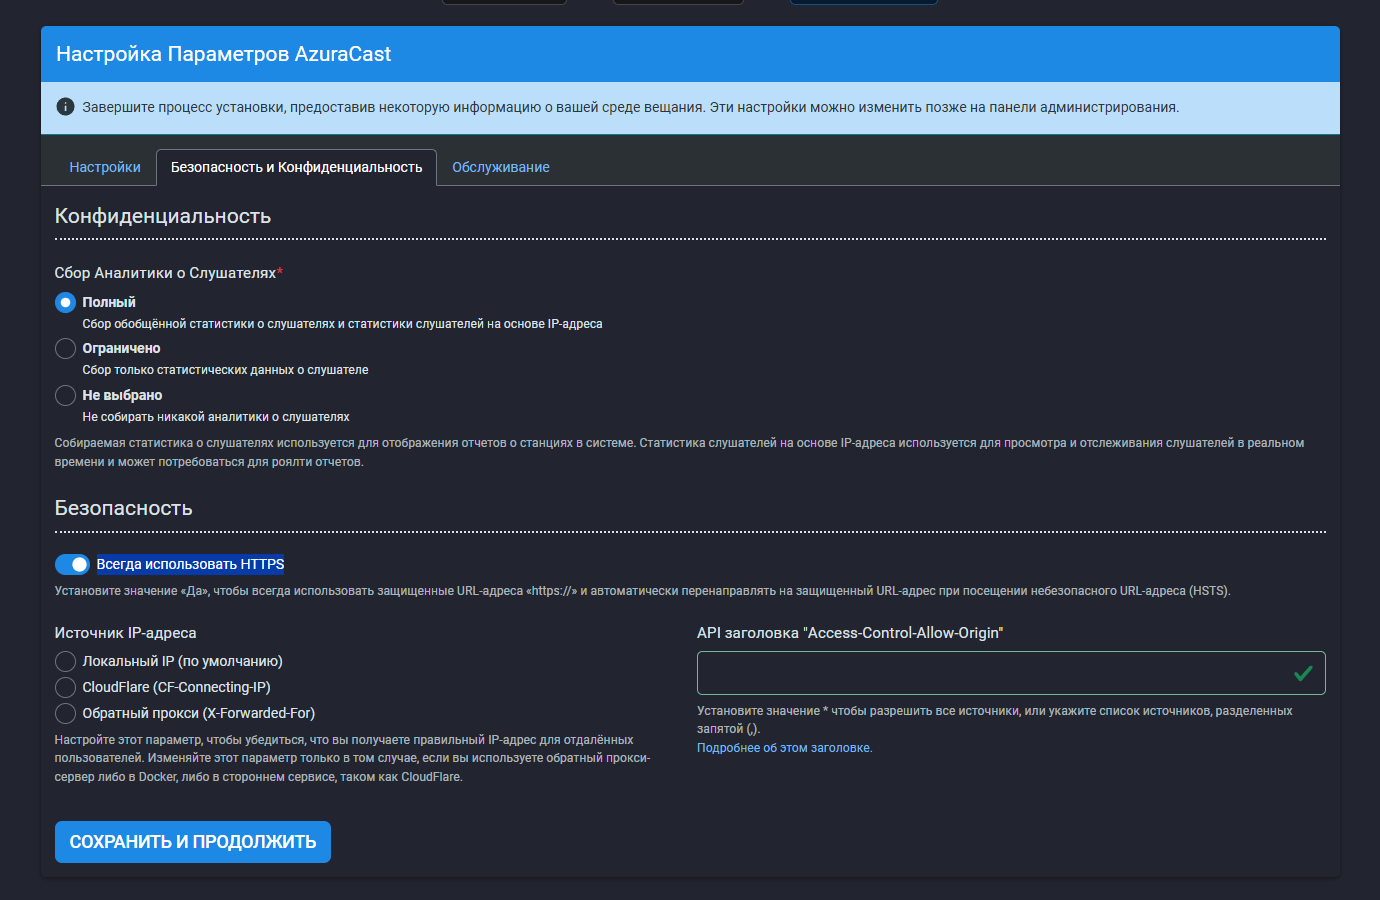
Also, set the "Always use HTTPS" slider to ON:
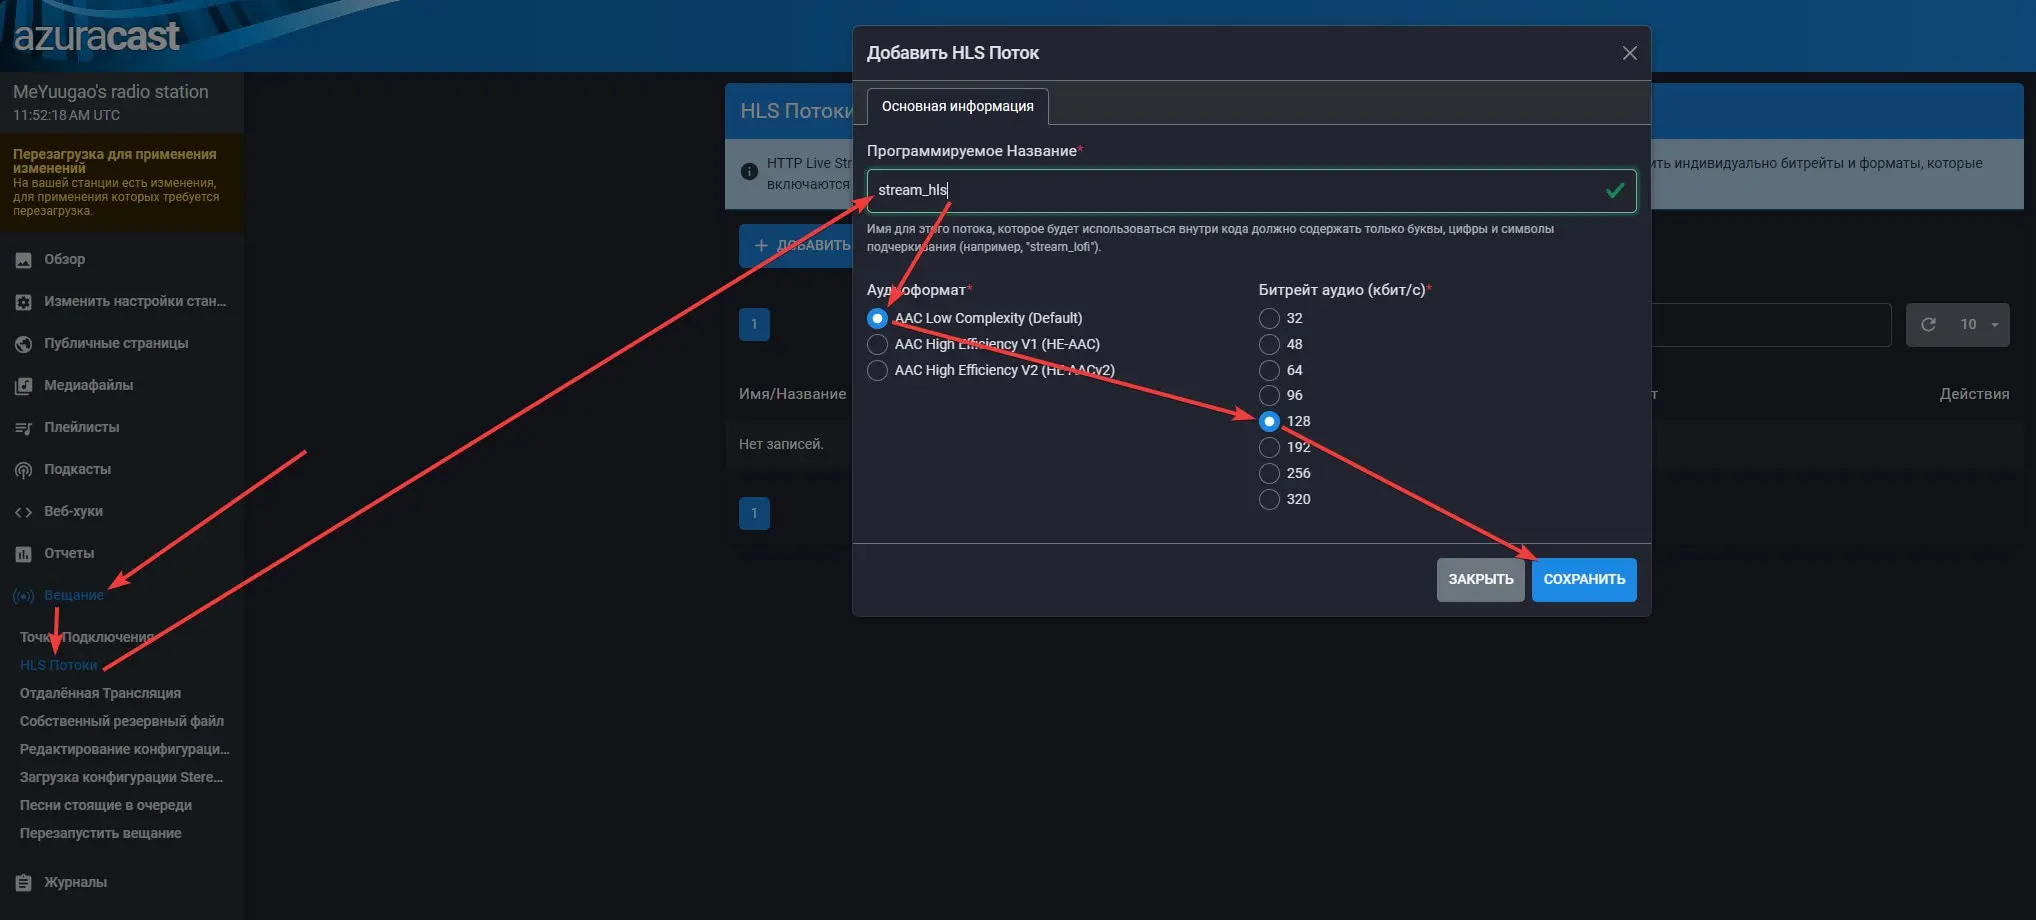
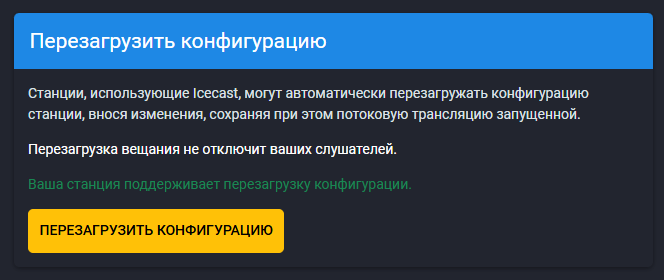
After that, you need to add a new HLS stream and restart the configuration:
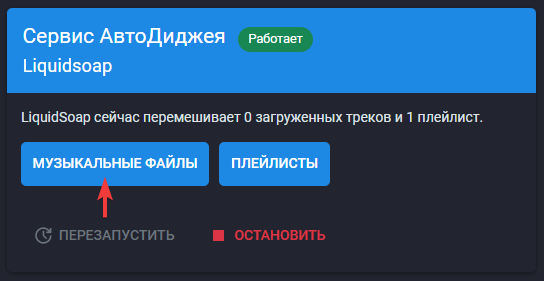
Add the tracks you want in this tab:
Next, copy this link:

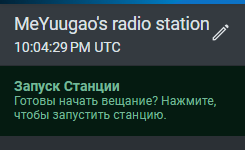
Turn on the station, paste the audio stream URL into the radio and your music will start playing!
Troubleshooting
Wsl/Service/RegisterDistro/CreateVm/HCS/HCS_E_SERVICE_NOT_AVAILABLE
To fix this error, enter the following command in cmd, running as an administrator:
dism /online /cleanup-image /restorehealth
MeYuugaos Radio Mod (RU_RU)
Я потратил около месяца в работе над этим модом и я очень рад, что наконец-то могу выложить его на ModRinth! Этот проект вдохновлен Dragon's Radio mod и создан для новых версий Minecraft (1.17.1-1.21.10). Мод может воспроизводить аудиопотоки HLS AAC (.m3u8).
Необходимо
• FFmpeg
Опционально
• Mod Menu
Ссылки
• ModRinth
Гуи
Радио
• Переключатель состояния (вкл/выкл).
• Текстовое поле для ссылки на аудиопоток.
• Ползунок громкости.
Динамик
• Переключатель состояния (вкл/выкл).
• Ползунок громкости.
Рецепты
Блоки
1. Радио - самый важный блок, источник звука и сигнала для динамиков.
2. Динамик - второй по важности блок, который принимает сигнал от радио и звучит достаточно громко, чтобы весь мир узнал о ваших музыкальных вкусах!
Предметы
1. Пульт дистанционного управления - используется для управления радио и динамиком: включения/выключения радио и динамика, привязки/отвязки динамика, изменения громкости радио и динамика, изменения ссылки на аудиопоток.
2. Электронная схема - используется для крафта радио и динамика.
3. Антенна - используется для крафта радио и динамика.
4. Батарея - используется для крафта радио и динамика.
5. Маленькая батарейка - используется для крафта пульта дистанционного управления.
6. Мембрана - используется для крафта динамика.
7. Маленькая мембрана - используется для крафта радио.
Функциональность
Зарядка пульта дистанционного управления
Для зарядки пульта дистанционного управления необходимо нажать SHIFT + ПКМ по заряженному радио с пультом в основной руке.
Открытие гуи радио и динамика
Для открытия гуи радио и динамика необходимо нажать ЛКМ по блоку с пультом в основной руке.
Управление радио
Чтобы задать URL аудиопотока, нажмите на основное текстовое поле и вставьте URL, затем включите радио, нажав на переключатель.
Для регулировки громкости можно перетаскивать ползунок громкости с помощью мышки или ввести нужный уровень громкости вручную с помощью клавиатуры.
Управление динамиком
Чтобы включить динамик, нажмите на переключатель.
Для регулировки громкости можно перетаскивать ползунок громкости с помощью мышки или ввести нужный уровень громкости вручную с помощью клавиатуры.
Привязка динамика
Чтобы привязать динамик, нажмите ПКМ заряженнным пультом сначала по радио, к которому хотите привязать динамик, а потом по динамику, который хотите привязать.
Настройки (Mod Menu необходим)
Используя Mod Menu, вы можете регулировать общую громкость всех радио и динамиков.
Начиная с 1.1.0, вы также можете изменять размер звукового буфера. Меньше = быстрее реакция, больше = стабильнее.
Заметки
К одному радио может быть привязано неограниченное кол-во динамиков
Максимальное расстояние, на котором динамик может быть привязан к радио определяется определяется gamerule с названием "meyuugaosradioConnectRadius", которое по умолчанию равно 50.
Гайд по установке FFmpeg (НЕОБХОДИМО)
Вам необходимо установить FFmpeg для того, чтобы мод мог воспроизводить m3u8 поток вашей радиостанции. Для этого перейдите на этот сайт.
Windows
Перейдите на этот сайт и скачайте последний полный релиз:
Распакуйте содержимое основной папки из архива в директорию C:\ffmpeg:
Создайте новую переменную среды:
Linux
FFmpeg устанавливается через менеджер пакетов вашего дистрибутива.
Например, sudo apt install ffmpeg (Debian/Ubuntu), sudo dnf install ffmpeg (Fedora/RHEL) или sudo pacman -S ffmpeg (Arch).
Гайд по установке AzuraCast (ваша личная публичная радиостанция)
Если вы используете Windows, мы будем использовать инструмент "WSL" (Windows Subsystem for Linux), который позволяет запускать Linux-дистрибутивы в изолированной среде без необходимости использования виртуальных машин или перезагрузки ПК. Если вы используете Linux, просто пропустите установку WSL и Docker в Windows.
Установка WSL
Первым делом, откройте powershell от имени администратора и пропишите следующую команду:
wsl --install
Дождитесь скачивания и установки дистрибутива, задайте имя пользователя и пароль:
ЗАМЕТКА: В терминале при введении пароля все символы скрыты. Вы не будете видеть то, что пишете.
Установка и настройка Docker, AzuraCast, localtunnel, ffmpeg
Первым делом установите Docker Desktop по этой ссылке и включите эту настройку:
Откройте cmd от имени администратора и впишите туда следующие команды по очереди:
wsl --set-default-version 2
wsl --set-default Ubuntu
Далее откройте терминал Ubuntu:
Впишите туда следующие команды по очереди и следуйте инструкциям по установке:
sudo su -
mkdir -p /var/azuracast
cd /var/azuracast
curl /fsSL https://raw.githubusercontent.com/AzuraCast/AzuraCast/main/docker.sh > docker.sh
chmod a+x docker.sh
./docker.sh install
ЗАМЕТКА: Замените "/fsSL" на "-fsSL", сайт не разрешает написать "curl" и "-fsSL" вместе, отчего я вынужден был заменить '-' на '/'.
ЗАМЕТКА: На вопрос "You should update the Docker Utility Script after changing release channels. Automatically update it now?", ответьте "n".
Теперь нужно установить localtunnel. Не закрывая текущую сессию, введите в терминал Ubuntu следующие команды по очереди:
apt update
apt install nodejs npm
npm install -g localtunnel
Запуск и настройка радио
Запустите терминал Ubuntu и пропишите эти команды по очереди:
sudo su -
cd /var/azuracast
docker compose up -d
lt --port 80
Далее копируйте ссылку и перейдите по ней в вашем браузере.
При первом запуске вам необходимо будет создать учётную запись суперадминистратора:
После создания учётной записи, задайте название вашей радиостанции, включите HLS и как основной url-адрес сайта установите ссылку, которую вы скопировали (каждый раз, когда вы делаете новую ссылку, её будет необходимо обновлять в настройках):
А также установите ползунок "Всегда использовать HTTPS" в состояние ВКЛ:
После этого вам нужно добавить новый HLS поток и перезапустить конфигурацию:
Добавьте нужные вам треки в этой вкладке:
Далее скопируйте эту ссылку:
Включите станцию, вставьте ссылку на аудиопоток в радио и ваша музыка заиграет!
Устранение неполадок
Wsl/Service/RegisterDistro/CreateVm/HCS/HCS_E_SERVICE_NOT_AVAILABLE
Чтобы устранить эту ошибку, введите следующую команду в cmd, запустив её от имени администратора:
dism /online /cleanup-image /restorehealth