Compatibility
Minecraft: Java Edition
Platforms
Supported environments


Tags
Creators
Details


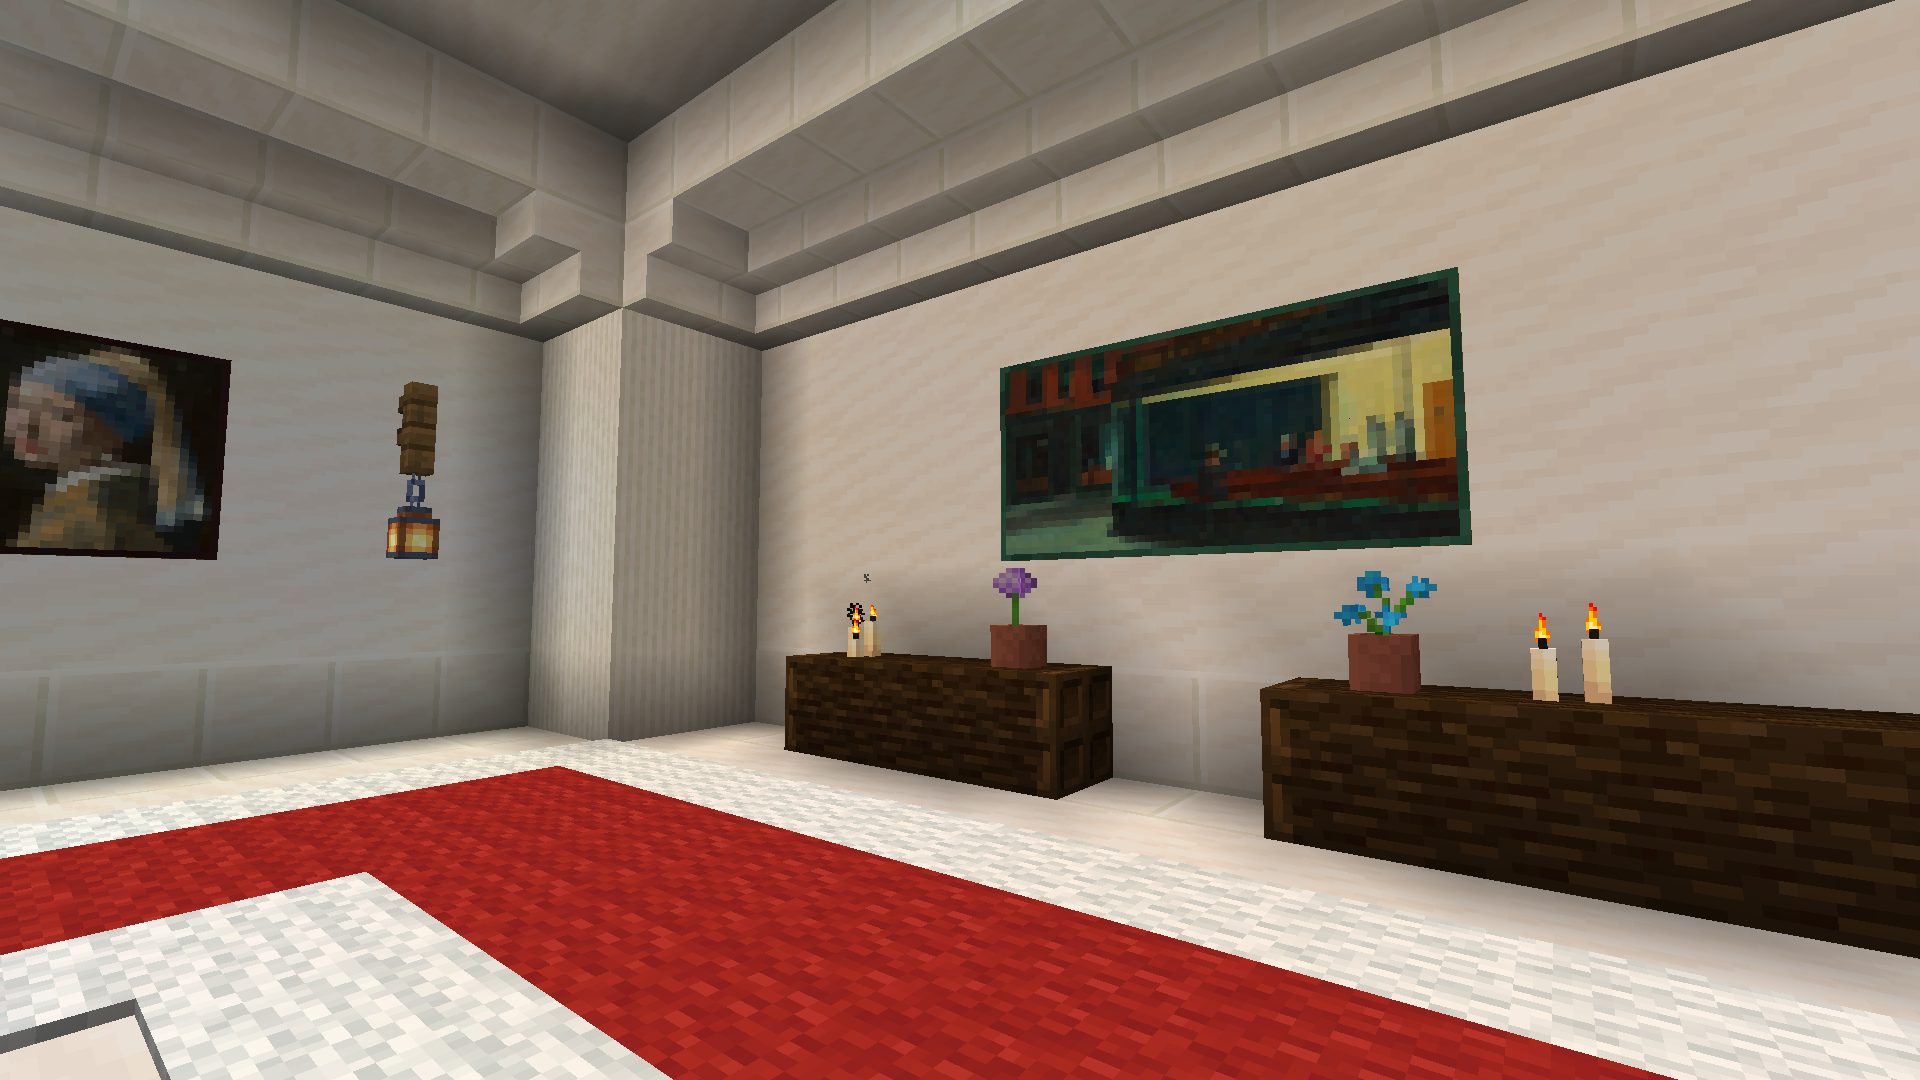
Add your own custom paintings to Minecraft! Add as many as you like without being restricted to re-texturing vanilla paintings! Each painting can have a custom size and texture, and even name and artist labels. Using a custom "Painting Pack", add custom paintings to any world, even servers!
Out of the box, you'll also see a built-in pack containing the four elemental-themed paintings bundled in the game's assets that otherwise are not normally placeable. Enjoy your stylish Air, Earth, Fire, and Water paintings!

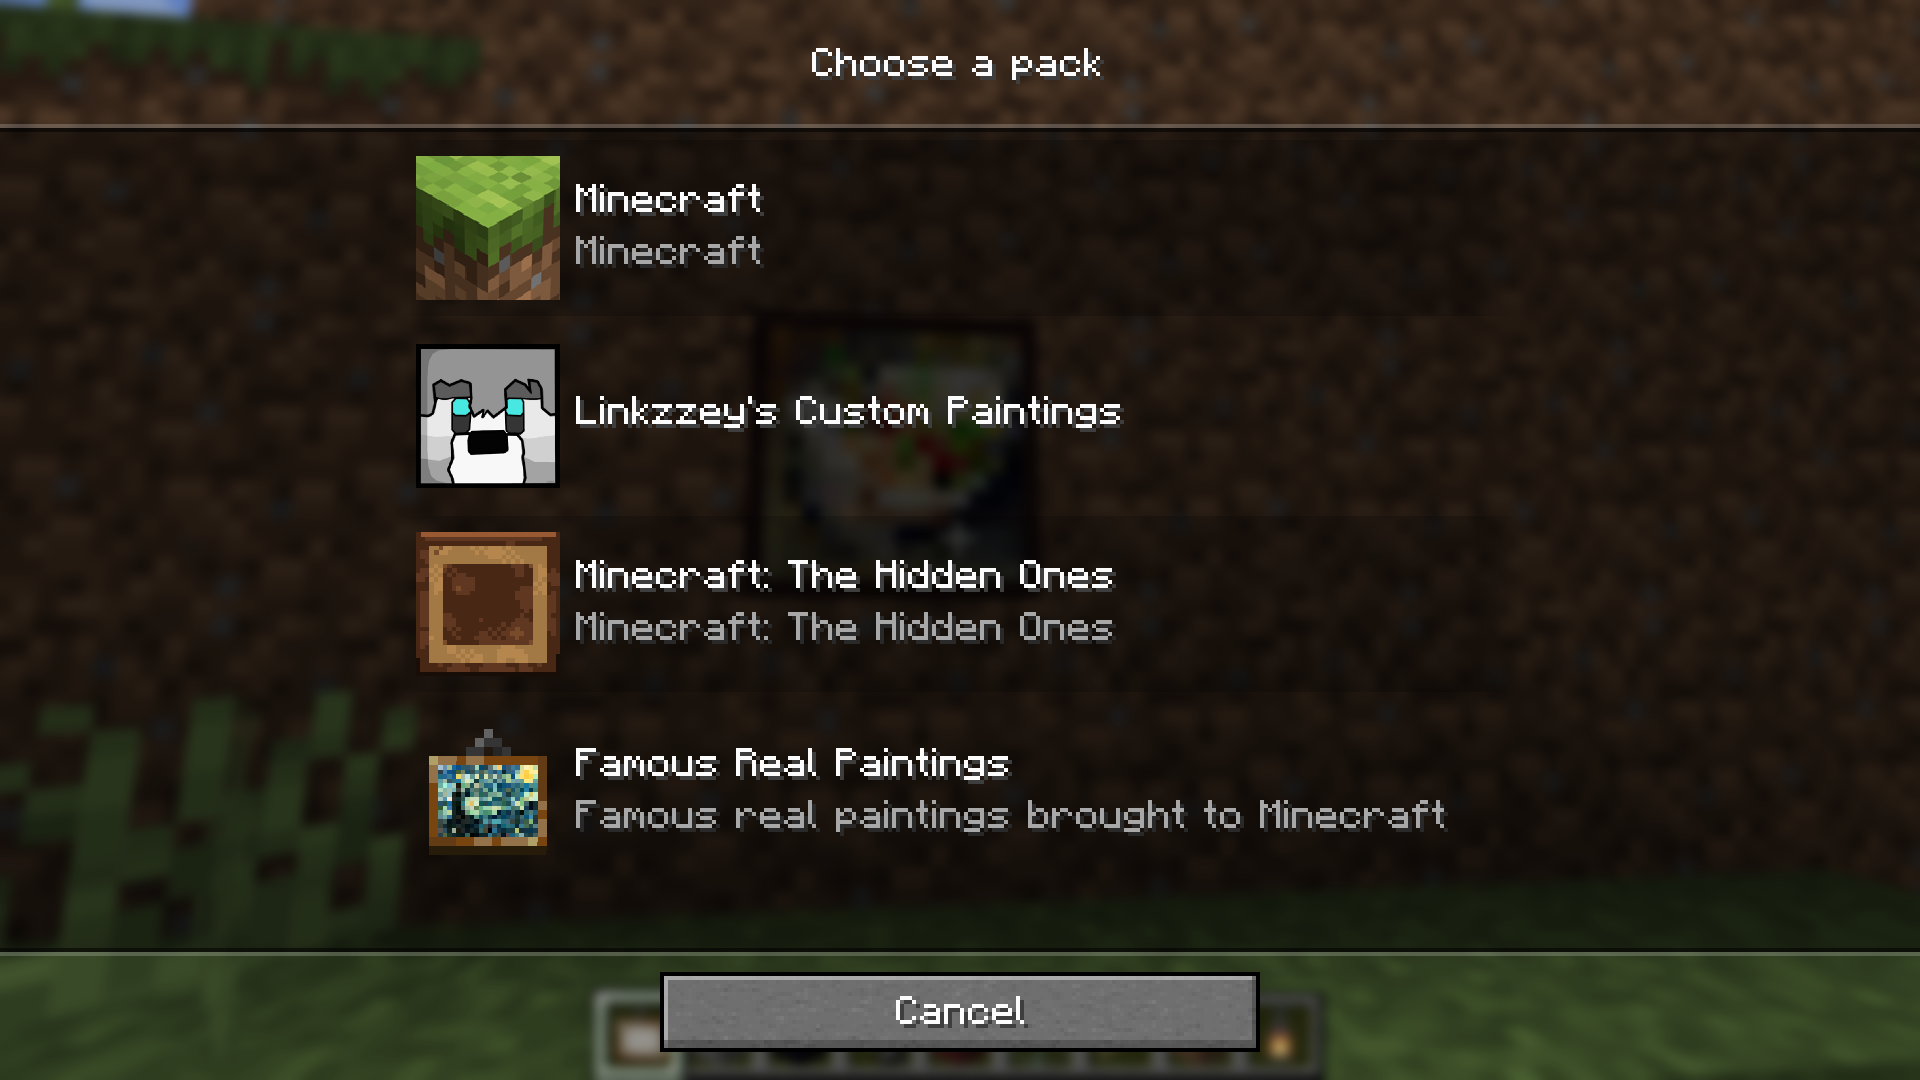
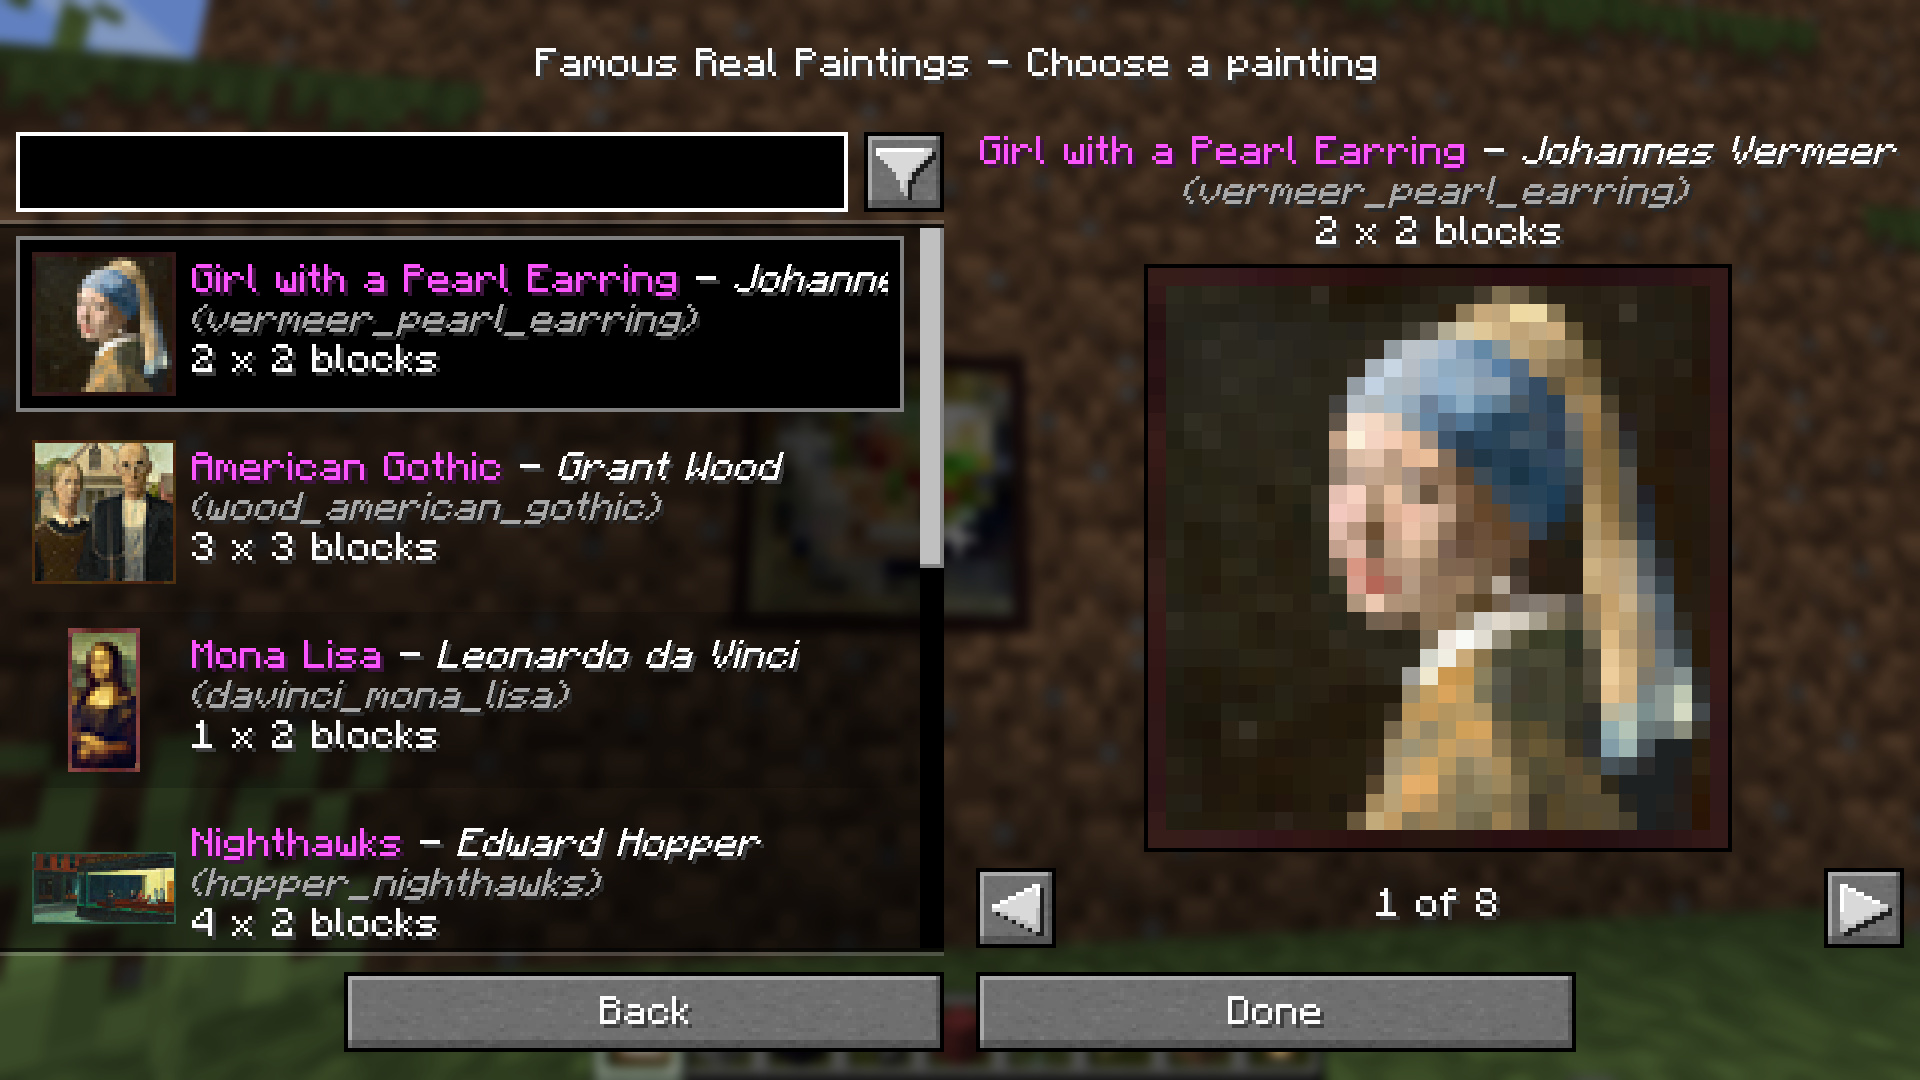
In order to better work with all the paintings in your game, this mod also creates a painting picker menu. Instead of the game placing a random choice every time, placing a painting will now open up a menu where you can choose a pack and painting, complete with search and filtering. Now you can place the exact painting you want first time, every time!
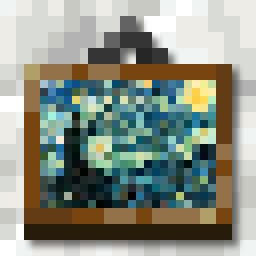
The mod also gives every painting its own custom item icon — both from your installed packs and from the vanilla variants! Each painting's artwork is scaled down and dressed up with a hanger and shadow to fit the standard 16×16 item shape, so you can tell what's what at a glance in your inventory, hotbar, and item frames. Heavily inspired by Vanilla Tweaks' "Unique Painting Items" resource pack. The custom-pack and vanilla rendering each have their own toggle in the client-side config.
Please note that no new paintings are included in this mod. You need to supply your own! You can use this mod without adding and packs, and it'll still give access to the hidden paintings and the fancy new painting picker menu. However, if you're looking for a painting pack that supports this mod, check out my Famous Real Paintings pack that adds stylized representations of some of the worlds' most famous paintings from real life!
Adding a painting pack to your world
The simplest way to add a painting pack to your world is to drop it in the custompaintings folder inside the world
save, i.e. .minecraft/saves/My Awesome World/custompaintings/FamousPaintings-1.0.zip. The pack can be in zip or folder
form.
└── .minecraft/
    ├── config/
    ├── logs/
    ├── resourcepacks/
    ├── saves/
    │   └── My Awesome World/
    │       ├── advancements/
    │       ├── custompaintings/
    │       │   └── FamousPaintings-1.0.zip  ᐊ
    │       ├── data/
    │       ├── datapacks/
    │       ├── DIM1/
    │       ├── DIM-1/
    │       ├── entities/
    │       ├── playerdata/
    │       ├── poi/
    │       ├── region/
    │       ├── stats/
    │       └── level.dat
    ├── options.txt
    └── servers.dat
You can also add a pack to a world by open the mod's main menu (see below), navigating to the 'Manage Packs' screen, and dragging the pack zip file or folder onto your game window, similar to how you would do it with resource packs. The mod will take care of copying the files over and should automatically refresh the list for you to let you know it worked!

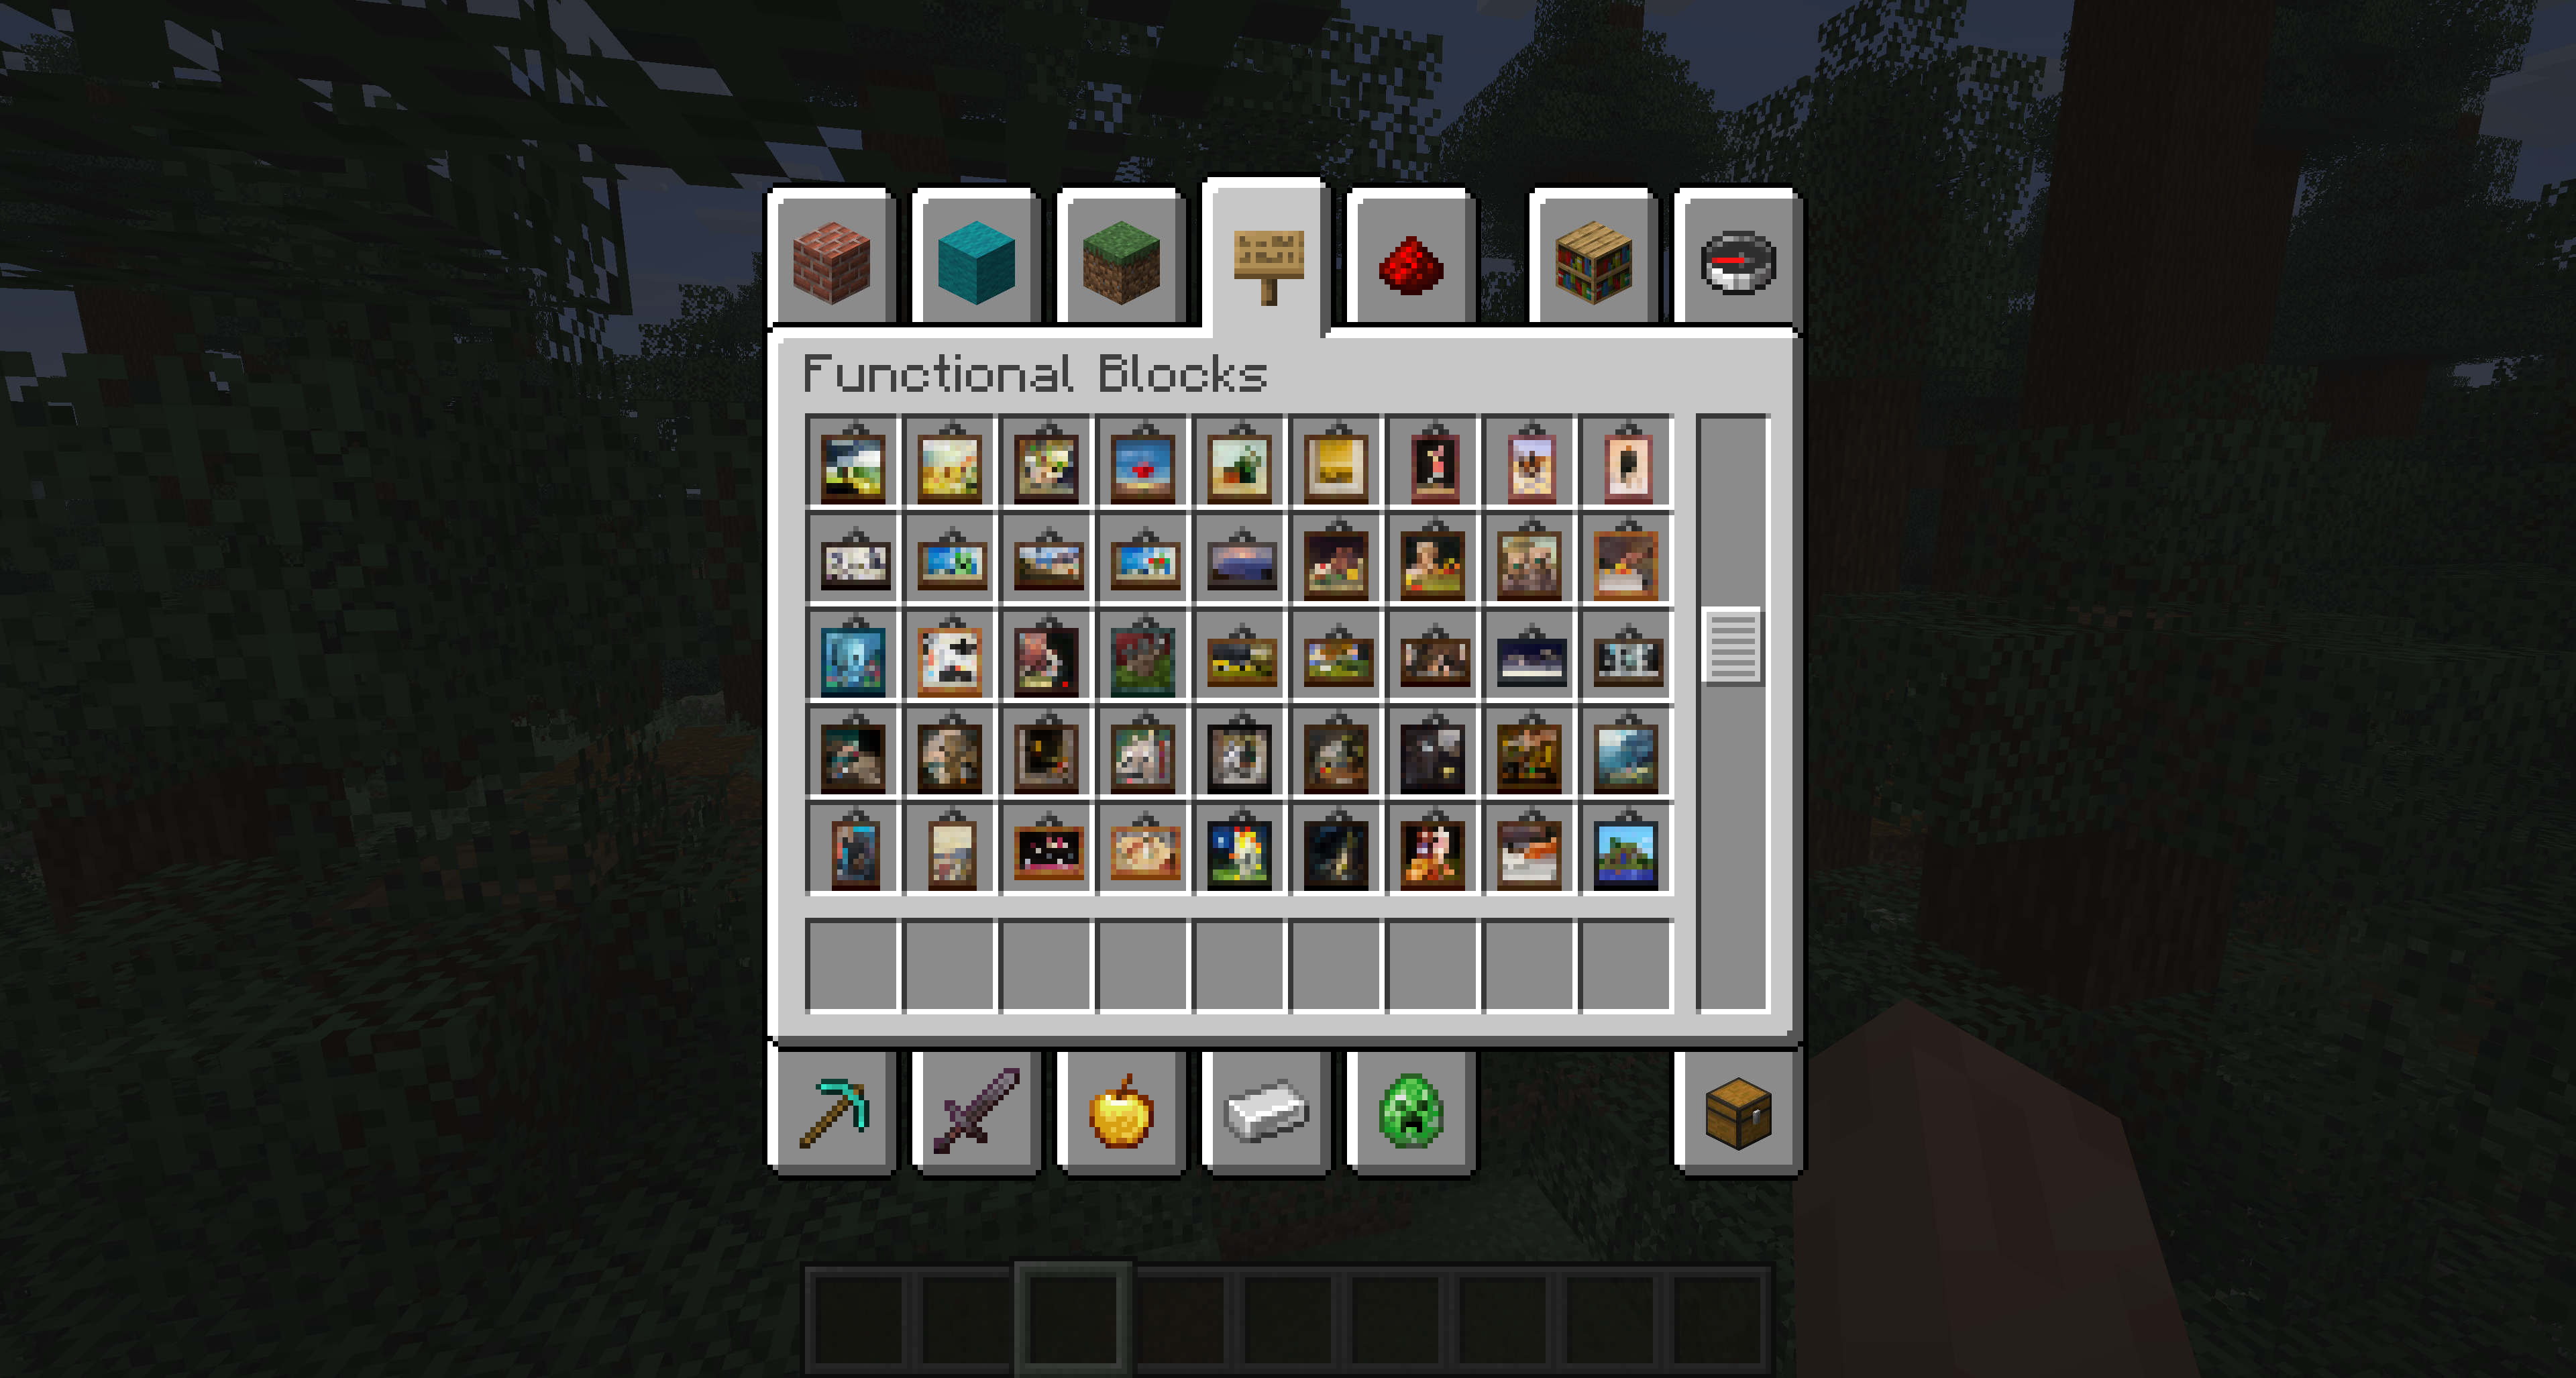
Creative inventory
Similar to vanilla paintings, all your custom paintings will show up in the creative inventory under functional blocks. The item models are all generated dynamically at runtime based on your supplied texture and painting dimensions to give a surprisingly high quality approximation of the painting! Heavily inspired by Vanilla Tweaks' "Unique Painting Items" resource pack. This functionality is toggleable via the config and config menu client side.
Stonecutter recipes
Based on the "Painting Picker" datapack from Vanilla Tweaks, all the unique items for your custom paintings will also be available as stonecutter recipes! Just pop in the generic/random painting item in the input and you'll be able to craft items bound to a specific painting, that will skip the UI and always place that variant! The same applies to vanilla painting variants — drop a generic painting in and pick the exact Kebab, Aztec, etc. you want, including the otherwise-unplaceable Air, Earth, Fire, and Water elementals. The custom-pack and vanilla recipes have their own toggles in the server-side/per-world config.
Adding a painting pack to your server
Adding a pack to a server must be done by a server admin with access to the server's filesystem. Similar to installing
on a single player world, simply copy the pack into the custompaintings folder inside the server's world save.
└── <server root> /
    ├── config/
    ├── logs/
    ├── world/
    │   ├── advancements/
    │   ├── custompaintings/
    │   │   └── FamousPaintings-1.0.zip  ᐊ
    │   ├── data/
    │   ├── datapacks/
    │   ├── DIM1/
    │   ├── DIM-1/
    │   ├── entities/
    │   ├── playerdata/
    │   ├── poi/
    │   ├── region/
    │   ├── stats/
    │   └── level.dat
    ├── banned-ips.json
    ├── banned-players.json
    ├── eula.txt
    ├── ops.json
    ├── server.properties
    ├── usercache.json
    └── whitelist.json
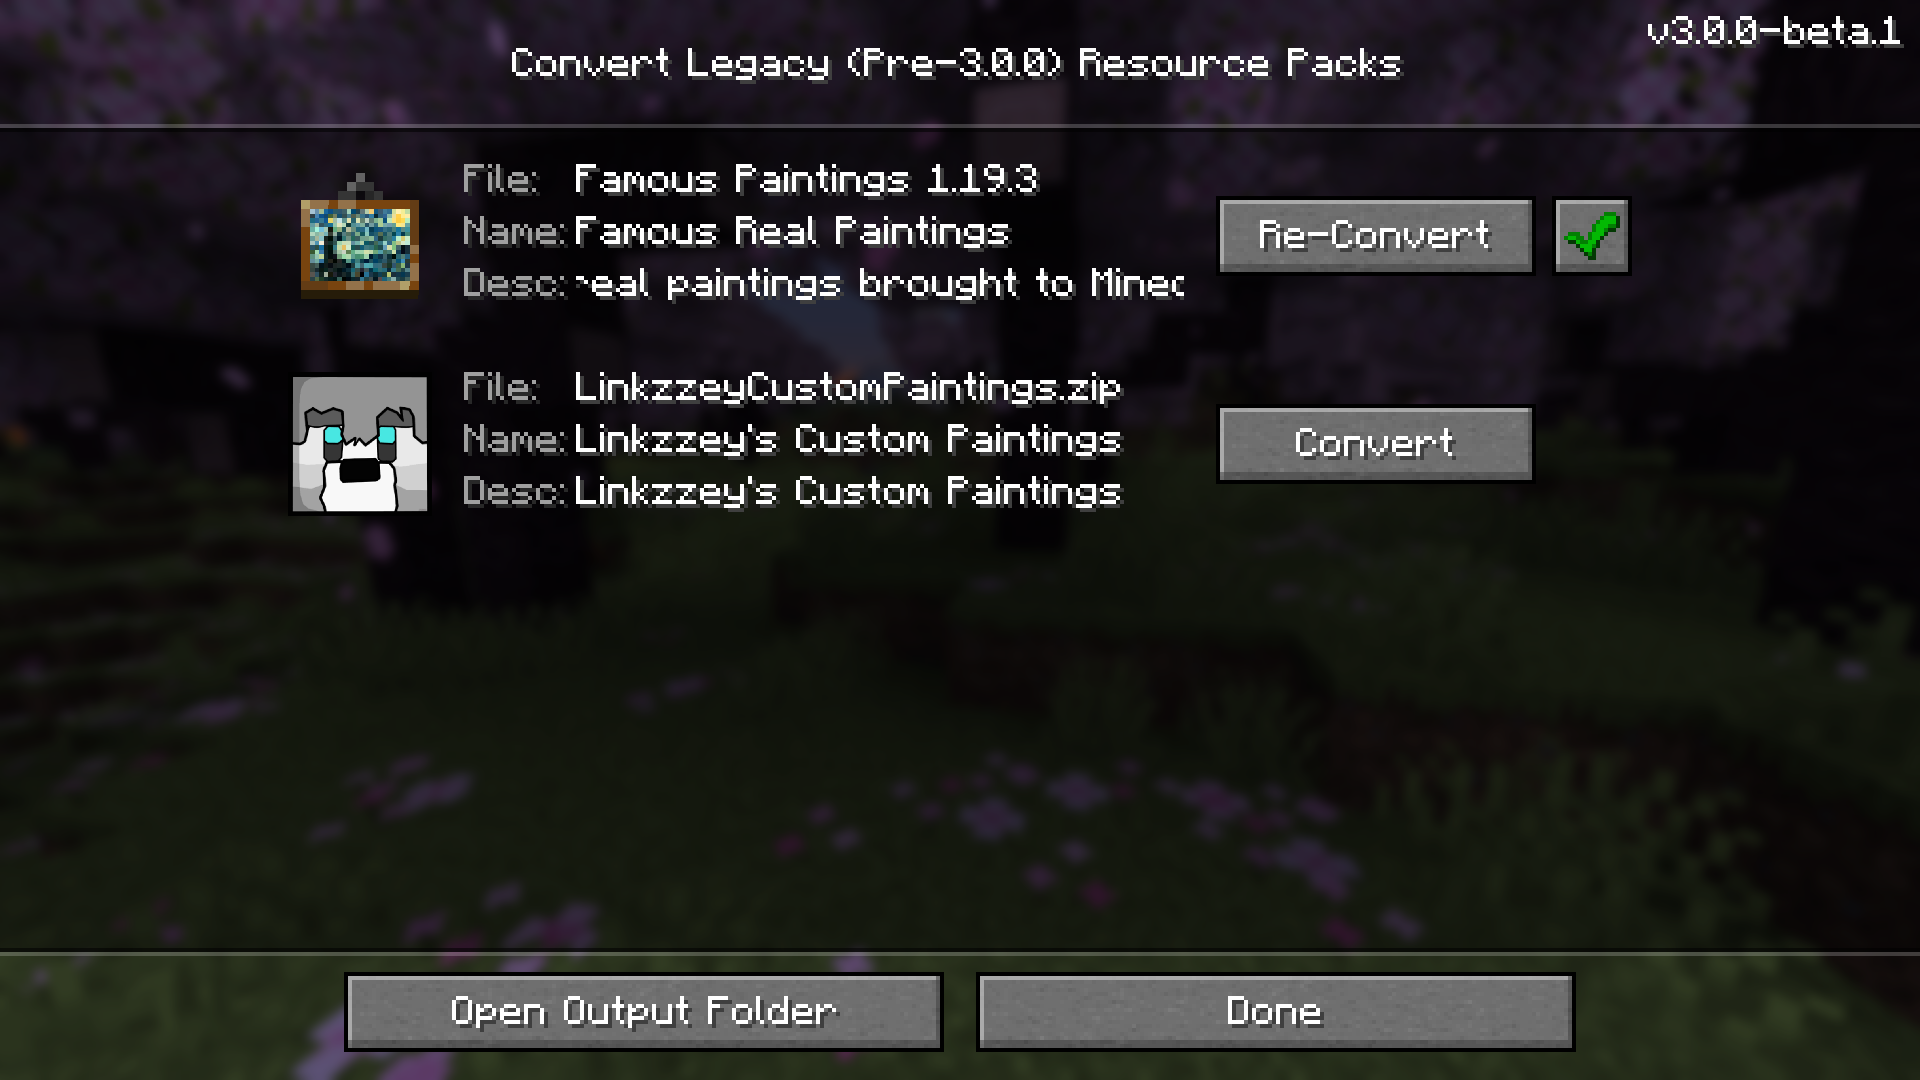
Migrating from pre-3.0.0 resource packs
If you are a user of Custom Paintings before the 3.0.0 change to server-driven custom format painting packs (i.e. you still have resource pack style painting packs), the easiest way to migrate to the new version is to simply install the new version of the mod and join your world! Then if you open the mod main menu (either through Mod Menu if you have it installed or via a keybinding - see the section below about the mod's main menu for more information) and navigate to the 'Convert Legacy Packs' screen. You should see your resource pack style painting packs listed there, and you can click to migrate each one into the new format directly installed on the current world!
If you want to convert them quickly for multiple worlds at once or for servers, uncheck the toggle at the top (or access the same screen when not connected to a world) to output the converted packs to a generic temp directory and click the "Open Output Folder" to view them in your PC's file browser!
Creating a painting pack
Pack format
The custom paintings for this mod are powered by painting packs. To create a painting pack for the mod, create a folder
for it somewhere on your computer and give it a helpful name, like "Scott's Custom Paintings". Inside that folder,
create another folder called "images" and copy all of your painting images inside. Make sure they are all PNG image
files. If you have a different format, you can convert it using an online file converter (find one using your favorite
search engine; there are many, many out there). Then again inside the pack's root folder, also create a file named
custompaintings.json.
.
└── Scott's Custom Paintings/
    ├── images/
    │   ├── castlescape.png
    │   ├── sunsetbeach.png
    │   ├── worldmap.png
    │   └── spookyforest.png
    └── custompaintings.json
Open the custompaintings.json file and fill it with contents that look something like this:
{
  "id": "scottscustompaintings",
  "name": "Scott's Custom Paintings",
  "description": "Scott's Custom Paintings",
  "paintings": [
    {
      "id": "castlescape",
      "name": "Castle in the Mountains",
      "artist": "Scott Lang",
      "width": 2,
      "height": 3
    },
    {
      "id": "sunsetbeach",
      "name": "Sunset at the Beach",
      "artist": "Claude Monet",
      "width": 2,
      "height": 2
    },
    {
      "id": "worldmap",
      "name": "World Map",
      "artist": "Scott Lang",
      "width": 4,
      "height": 3
    },
    {
      "id": "spookyforest",
      "name": "Nighttime Forest",
      "artist": "Scott Lang",
      "width": 3,
      "height": 1
    }
  ]
}
Pack properties
id: Text; alphanumeric, underscores, and dashes only - The unique ID of the painting pack. This must be different
from all
other painting packs (and different from the mod IDs for other fabric mods that add custom paintings).
name: Text (optional) - The name to show in the painting picker for this pack. If omitted the UI will simply
show the resource pack's filename.
description: Text (optional) - A short description of the pack to show in the painting picker.
paintings: List[Painting] - The definitions of all the paintings to pull from in the painting picker UI. Each
painting's id should correspond to the image's filename (without the '.png').
migrations: List[Migration] - The automatic migrations associated with this pack. It is not likely you'll want to
create one of these by hand, but the standalone painting pack editor (coming soon) can generate them for you when you
split large packs into multiple smaller ones.
Painting properties
Each painting will need its own properties defined to tell the mod how the paintings should be displayed in game.
id: Text; alphanumeric, underscores, and dashes only - The unique ID of the painting. This should correspond to the
name of the
painting's PNG image file in the pack's "images" folder (without the '.png').
name: Text (optional) - The name of the painting.
artist: Text (optional) - The artist of the painting.
width: Integer - The number of blocks wide this painting should occupy. For example, the vanilla Donkey Kong
painting would have a value of 4.
height: Integer - The number of blocks high this painting should occupy. For example, the vanilla Donkey Kong
painting would have a value of 3.
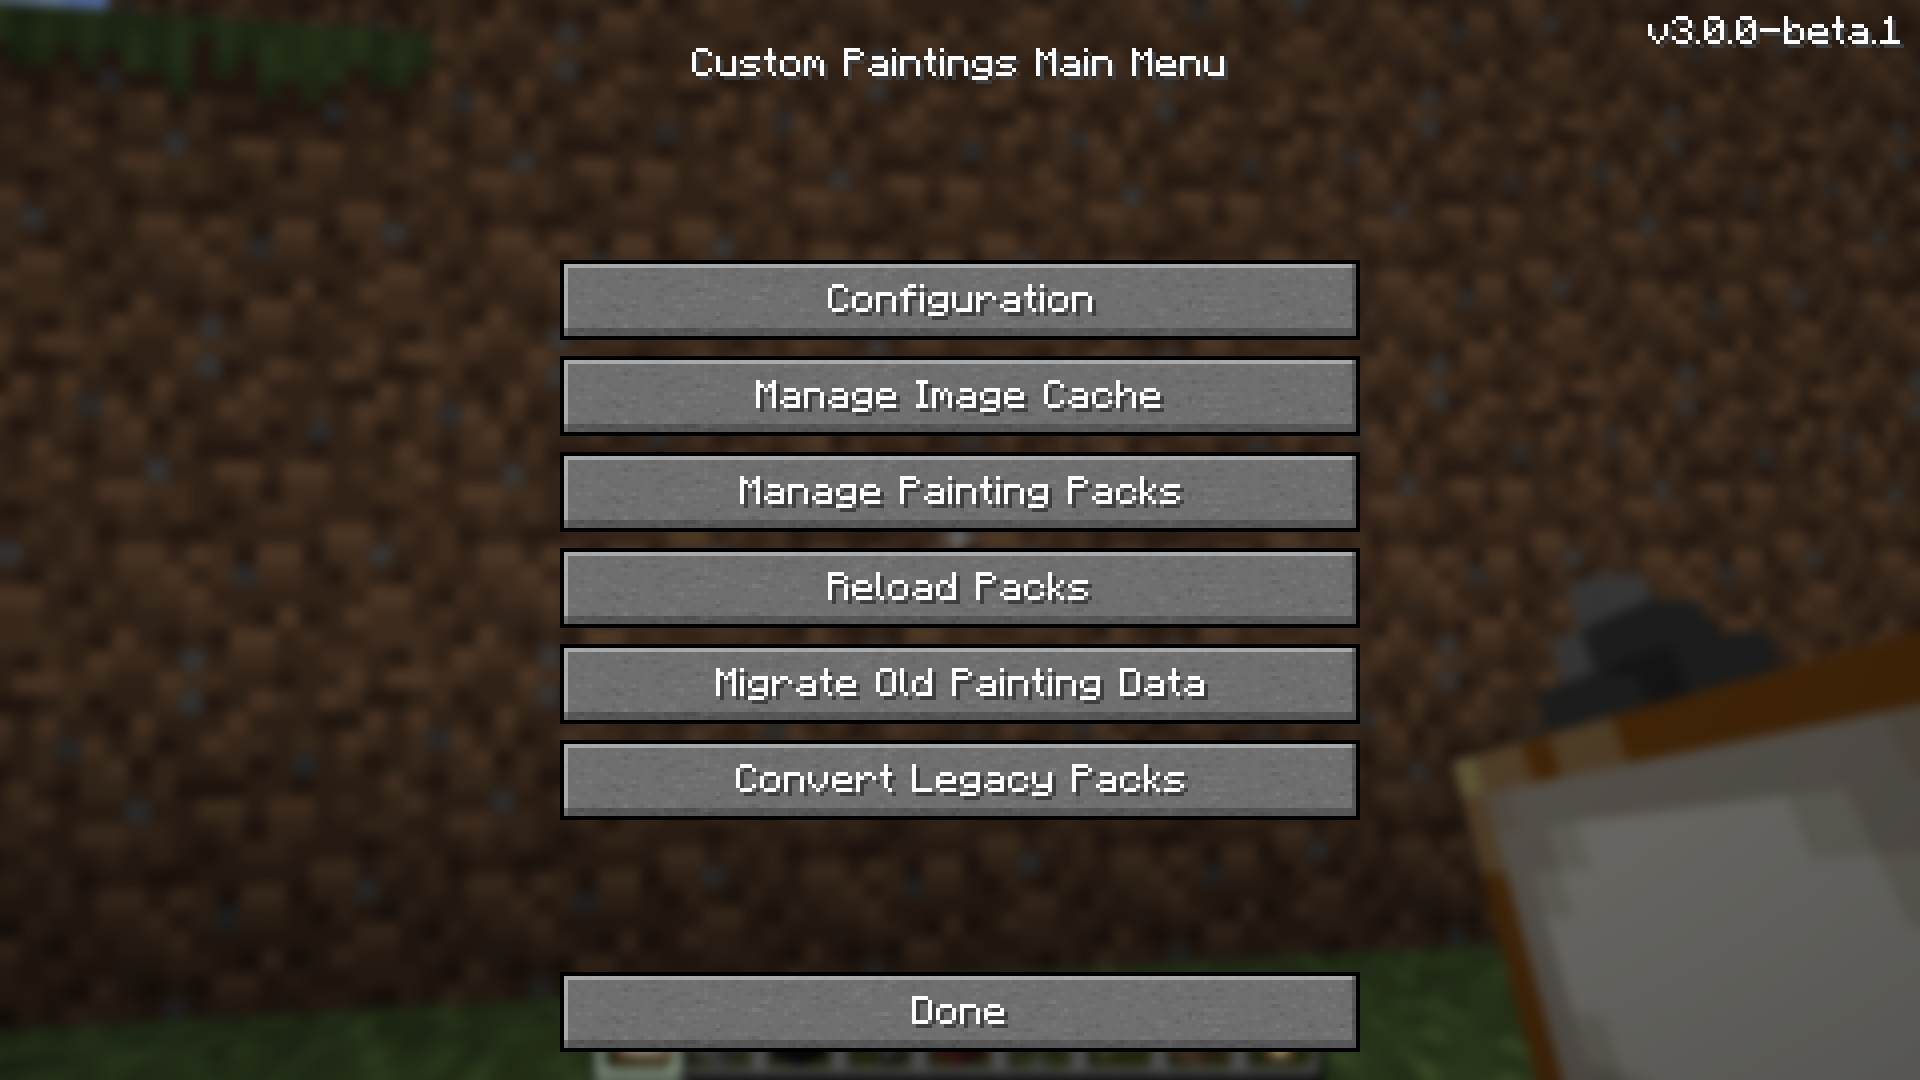
Mod main menu (config, pack management, cache management, etc.) {#main-menu}
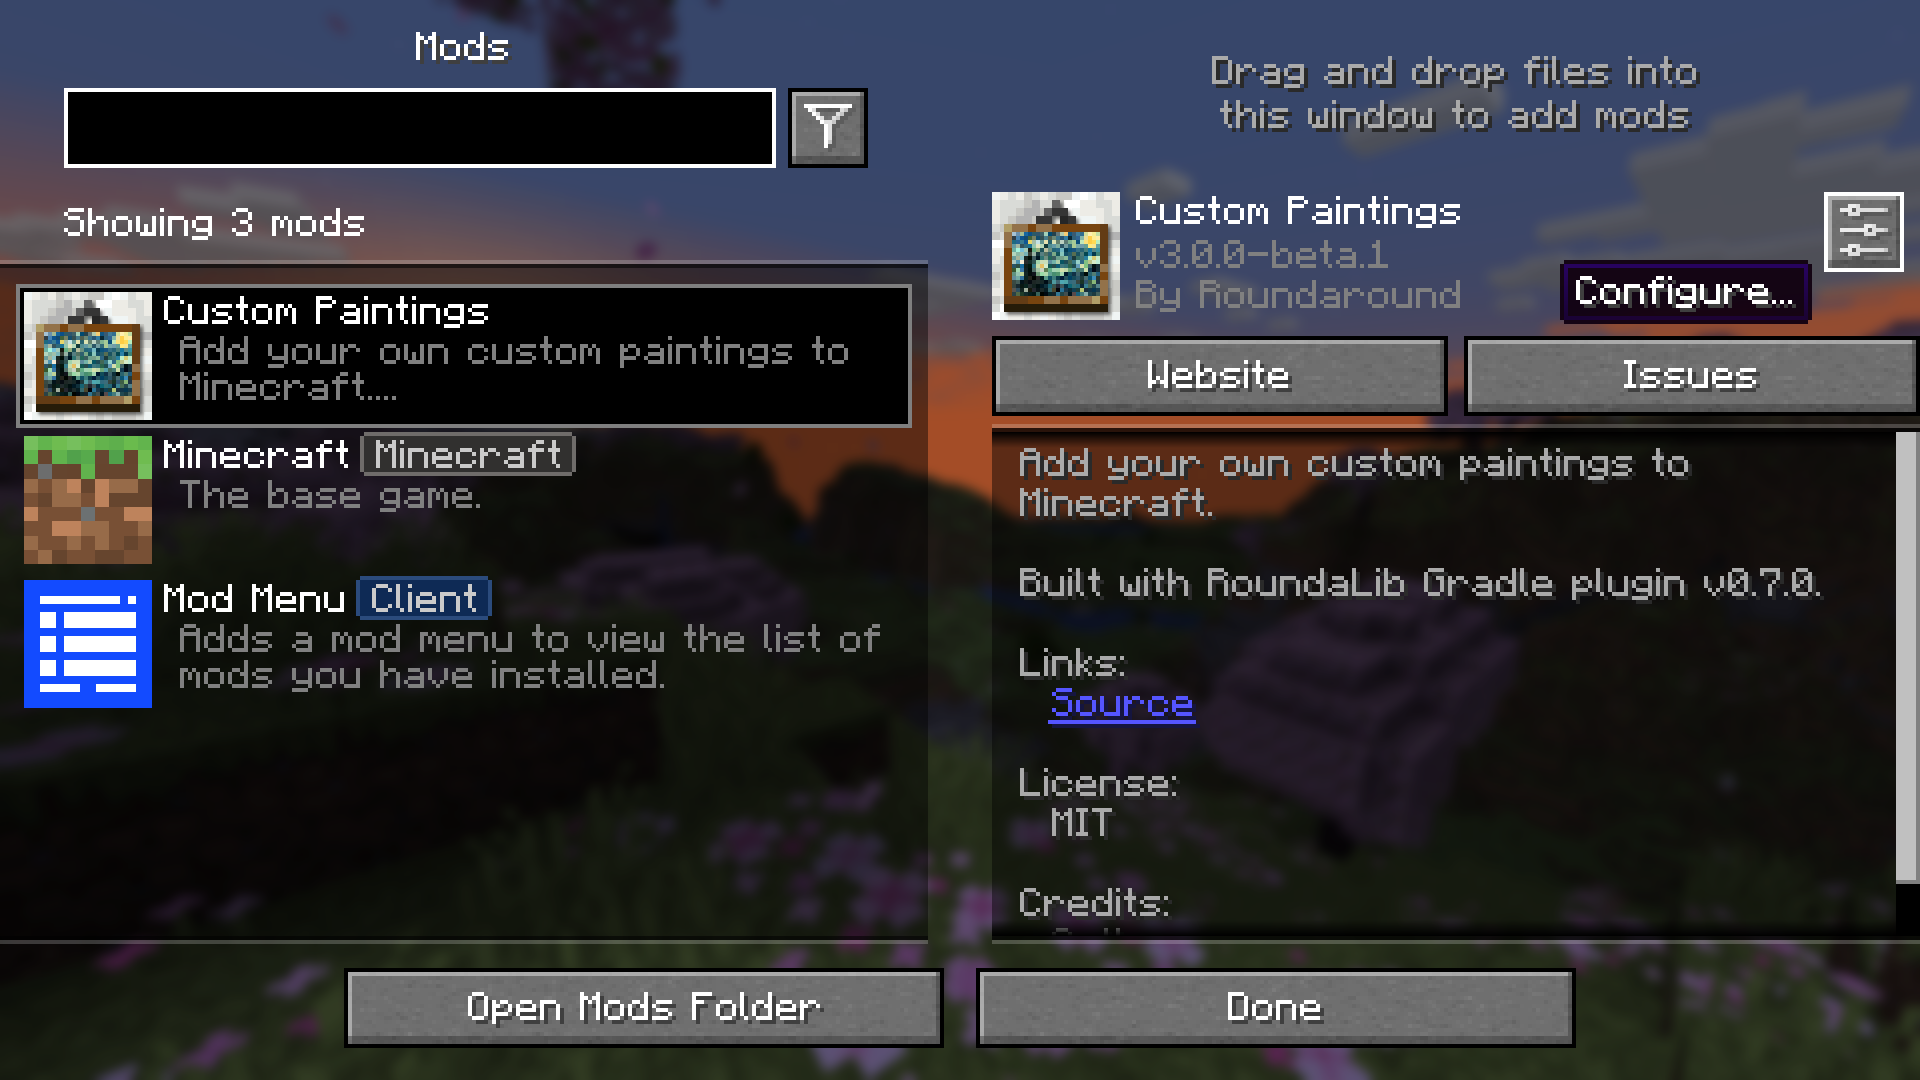
The mod ships with a main menu to access a suite of utilities for working with the mod. If you have Mod Menu installed, you'll find the main menu from the mod's configure button in the mods list.
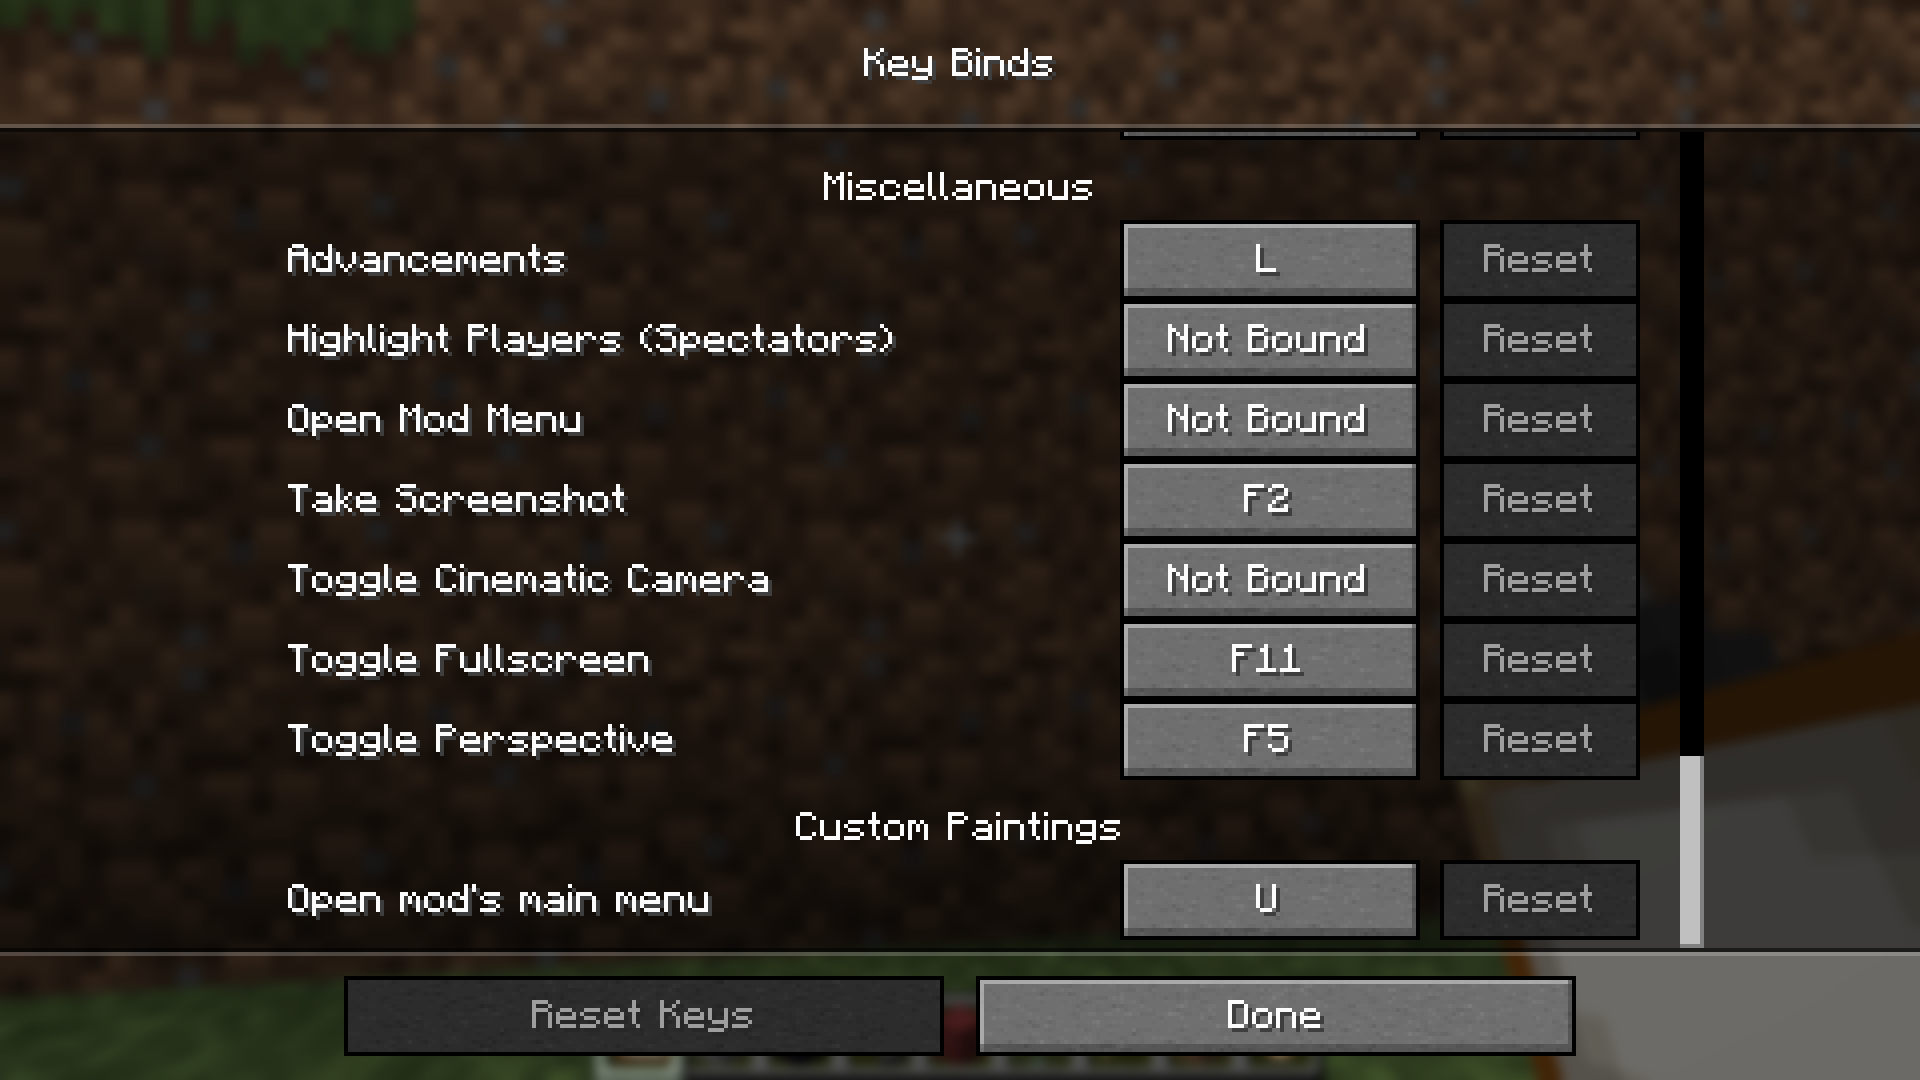
Otherwise, you can configure a keybind (U key by default) in Minecraft's vanilla keybinds menu which
will open the Custom Paintings main menu on key press.
Both of these options will open up the mod's main menu with buttons to navigate to all the configuration, management, and utilities you need for working with the Custom Paintings mod!
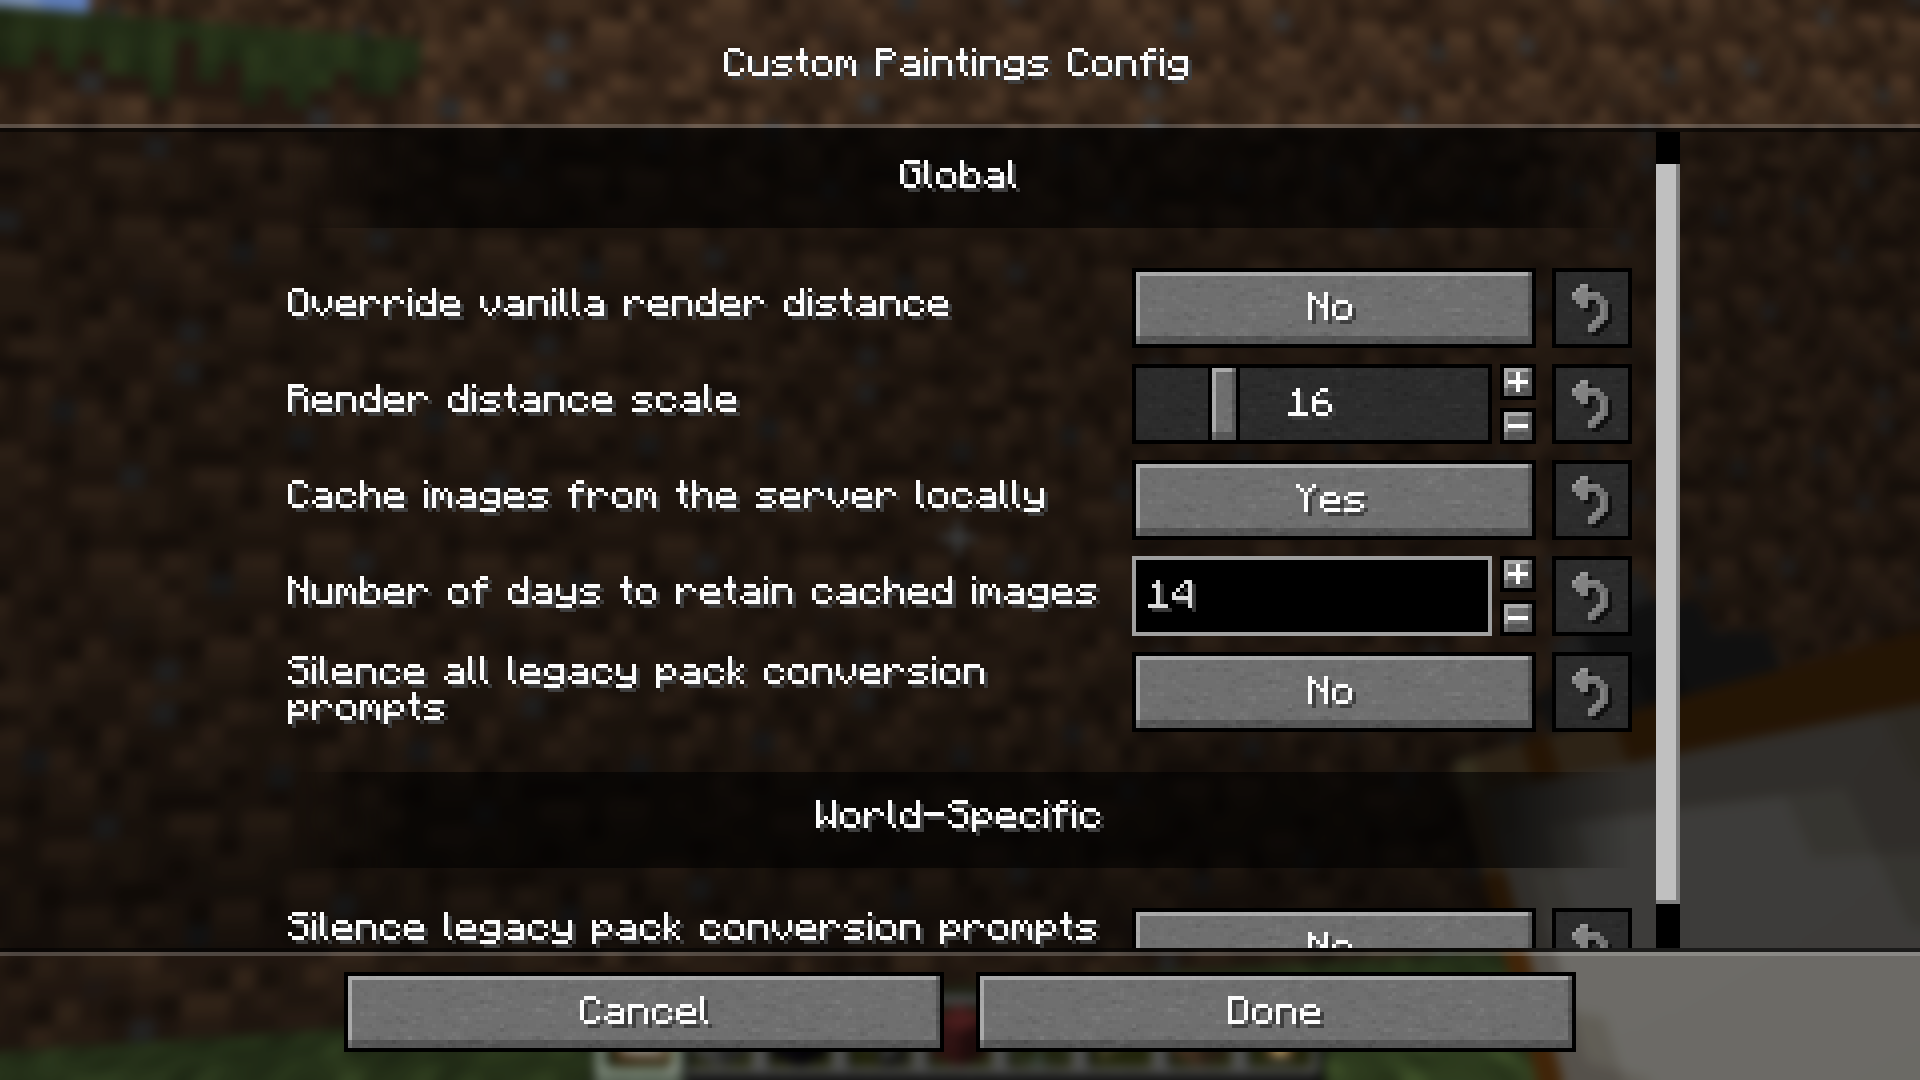
Mod configuration
The easiest way to manage mod configuration (for client-side/single player settings) is through the UI. From the main menu, navigate to the configuration page to adjust your settings from within the game.
The mod has multiple configuration files to tweaking mod behavior. There is some client-side only configuration hosted
in the main config folder inside your Minecraft's installation folder as well as world-specific configuration inside the
save file (world on servers) folder.
Client-side/global configuration
There is a "global" config file for your client that applies to all your single player worlds. This will be found in
<minecraft directory>/config/custompaintings.toml. You can also modify it through the config screen found from the
main menu.
Override vanilla render distance (overrideRenderDistance): true|false - Whether to override the game's default
painting rendering distance threshold. By default, paintings are rendered at the same distance as all other entities,
but enabling this will allow you to force the game to render them from further away. Default is false.
Render distance scale (renderDistanceScale): Integer; 1-64 - The number with which to scale the render distance
threshold for paintings. Higher numbers means rendering from farther away. Only applies when overrideRenderDistance is
true. Default is 16.
Cache images from the server locally (cacheImages): true|false - Whether to cache painting images that have been
downloaded from the server. Doing this can reduce loading time and save on network/server resources, but means storing
the images permanently on disk, which can potentially take up a lot of space. Default is true.
Number of days to retain cached images (cacheTtl): Integer; 1-1000 - How long cached painting images should be
stored in the cache before being marked as stale and getting automatically deleted. Default is 14.
Silence all legacy pack conversion prompts (silenceAllConvertPrompts): true|false - Whether to silence prompts
about converting legacy (pre-3.0.0) resource pack style painting packs to the new format. After joining a world, the mod
will check if you have any of the old style painting packs in your resourcepacks folder and prompt you to convert
them from the mod's main menu. Set this to true to silence them globally. Defaults to false.
Render the artwork on custom painting items (renderArtworkOnItems): true|false - Whether to render each custom
painting's artwork on its painting item icon (in inventories, hotbars, item frames, etc.). When false, custom painting
items fall back to the generic vanilla painting icon. Defaults to true.
Render the artwork on vanilla painting items (renderVanillaArtworkOnItems): true|false - The vanilla counterpart
to renderArtworkOnItems: whether to render the painting artwork on items for vanilla painting variants (Kebab, Aztec,
Earth, etc.) when the stack identifies a specific variant — for example, the painting entries in the creative inventory.
When false, those items use the generic vanilla painting icon. Defaults to true.
Single player per-world configuration
There is also a config file in each world's save folder, i.e.
<minecraft directory>/saves/My World/config/custompaintings.toml. If you are in a single player world, you can also
modify these from the same in-game menu as the client-side config.
Silence legacy pack conversion prompts for this world (silenceConvertPrompt): true|false - Same as
silenceAllConvertPrompts from the client-side config, except specific to the current world. Defaults to false.
Use the stone cutter to choose specific paintings (pickPaintingWithStoneCutter): true|false - Whether to add
stonecutter recipes for each painting in the active custom packs, so a generic painting item can be cut into one bound
to a specific custom painting variant (skipping the picker UI on placement). Defaults to true.
Use the stone cutter to choose specific vanilla paintings (pickVanillaPaintingWithStoneCutter): true|false - The
vanilla counterpart to pickPaintingWithStoneCutter: whether to add stonecutter recipes for each placeable vanilla
painting variant (Kebab, Aztec, etc.). Defaults to true.
Server-side configuration
Finally there is a config file on the server, inside the world's save folder, i.e.
<server root>/world/config/custompaintings.toml. You'll need access to the server's filesystem to change any of these
settings.
Throttle image transfers to clients (throttleImageDownloads): true|false - Whether to throttle the rate at which
custom painting images are sent to clients when they join the server. Highly recommended to keep this enabled,
especially if you have a moderate-to-large scale server (10+ players). Defaults to true.
Maximum number of image packets per second (maxImagePacketsPerSecond): Integer; 0-∞ - The maximum number of
image network packets to send per second to connected clients. Only applies when throttleImageDownloads is true. Set
to 0 to disable throttling by packet count. Defaults to 40.
Maximum number of image packets per second per client (maxPerClientImagePacketsPerSecond): Integer; 0-∞ - The
maximum number of image network packets to send per second to connected clients on a per-client basis. Only applies when
throttleImageDownloads is true. Set to 0 to disable throttling by packet count on a per-client basis.
Maximum size for each image packet in KB (maxImagePacketSize): Integer; 0-∞: The maximum size for each painting
image network packet that can be sent to clients, in KB. Only applies when throttleImageDownloads is true. Set to
0 (not recommended) to send all images in their entirety in single network packets. Defaults to 256.
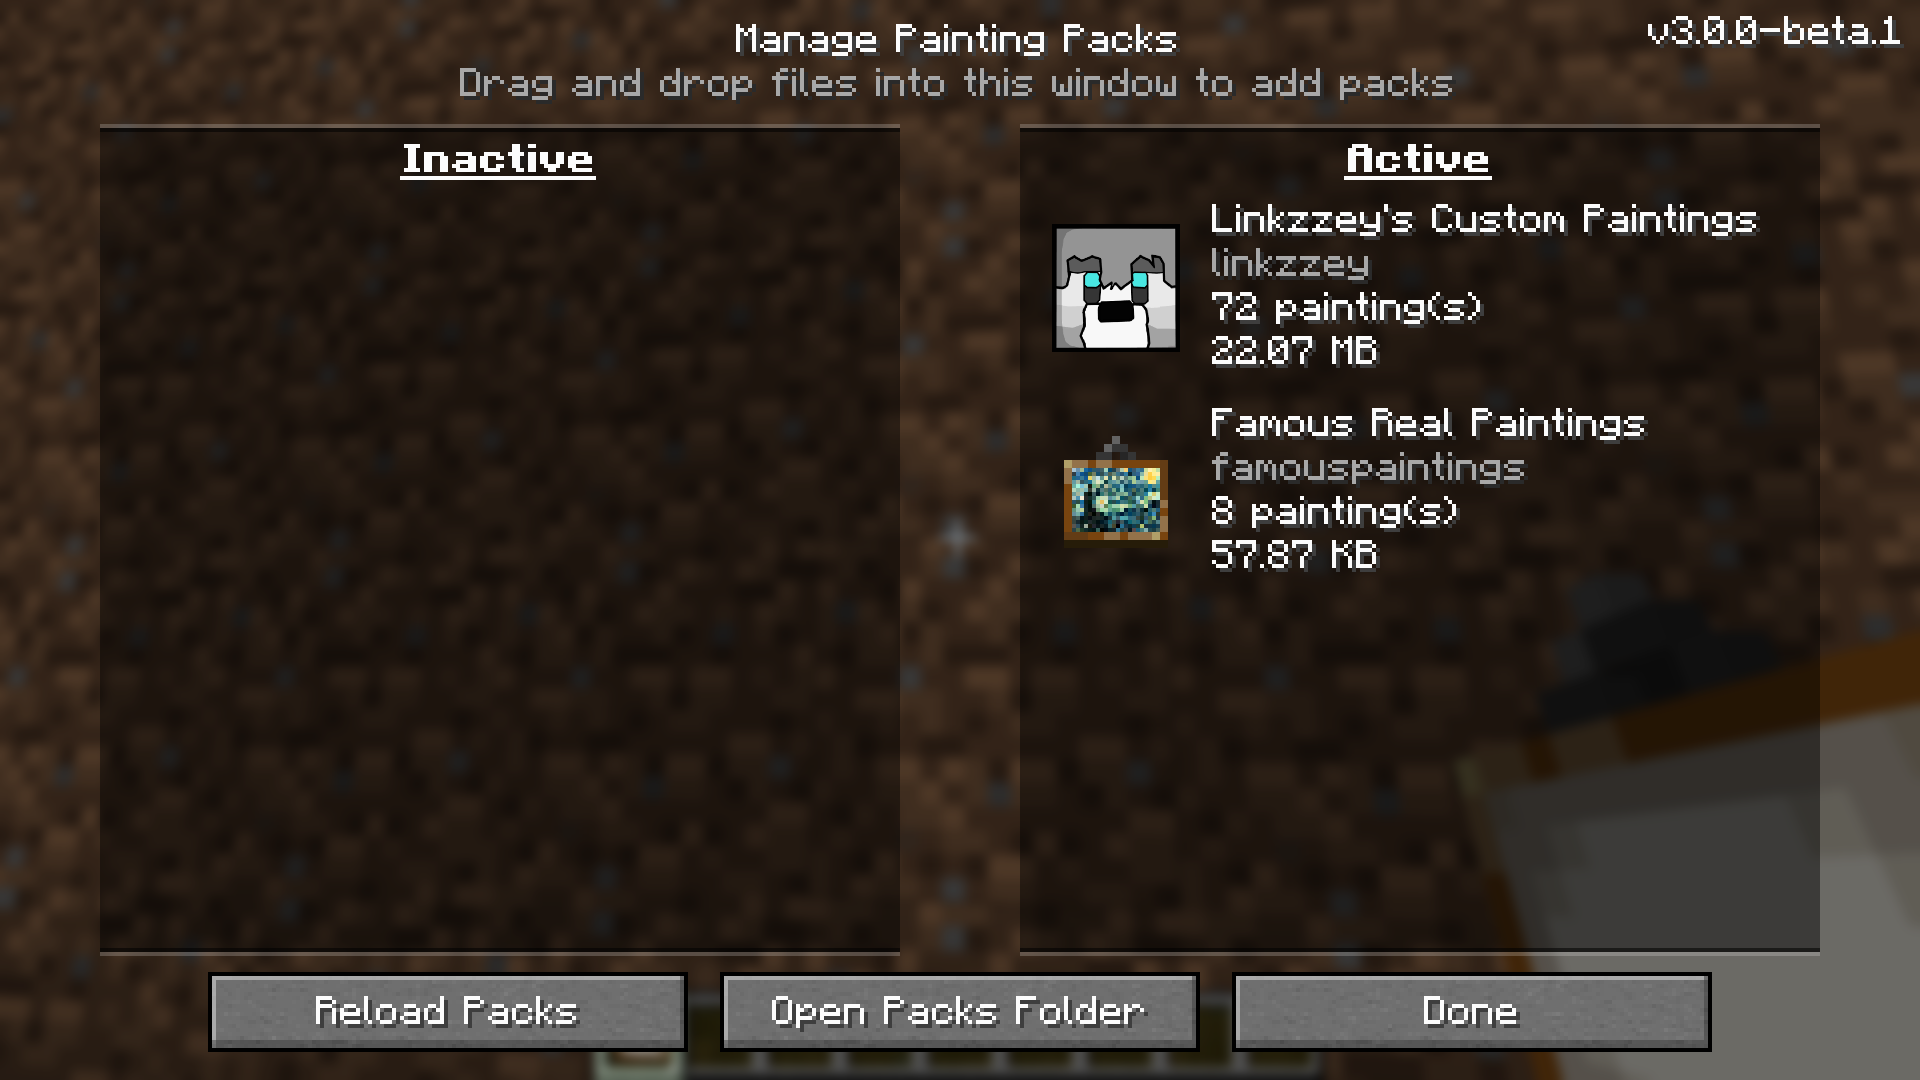
Enabling or disabling packs, or adding a pack to your world
Opening the packs screen will show you a summary of all the packs available in your world/server. For single player and if you have OP permission on a server, you'll see something that resembles the resource packs screen, giving you the ability to enable and disable packs without having to mess with the files.
On single player worlds, you'll also have the ability to drag and drop packs onto the game to add them to the world directly.
Converting old (pre-3.0.0) packs to the new format
If you already have painting packs for a previous version of the mod that used a resource-pack system, the mod can help you migrate the packs to the new format and even directly add them into your world.
Uninstalling this mod and data integrity
Starting with v3.0.0, Custom Paintings now stores all your painting choices and relevant data in separate files within your world's save folder. This means it is safe to load the game without the mod installed (i.e. after upgrading to a new Minecraft version) without risk of losing your data! When you decide to install the mod again, all the data will be loaded and your paintings will be restored.
Pre-3.0.0 (resource pack) versions
Before 3.0.0, Custom Paintings was resource-pack based rather than server-driven. If you're coming from an older version or have old packs lying around, these are the parts that worked differently:
-
Packs were Minecraft resource packs. Instead of dropping a pack into the world's
custompaintings/folder, you placed it inresourcepacks/and enabled it like any other resource pack - there was no in-game pack management or drag-and-drop install, and no server-side image transfer. On multiplayer every player (and the server) had to have the mod plus the exact same packs at the same versions, or paintings wouldn't render. The mod was really built with single player in mind. -
Textures lived inside the pack's
assetstree. Thecustompaintings.jsonwent at the root of the resource pack, and each painting's PNG went inassets/<pack id>/textures/painting/<painting id>.png- the packiddetermined the texture directory. (The 3.0.0+ format instead uses a standalone pack folder with animages/subfolder.) Images were PNG, ideally 16 pixels per block. -
The JSON schema was slightly different. Pack
idallowed alphanumeric and underscores only (no dashes), there was nodescriptionfield, and any painting texture with no matching entry defaulted to 1×1. The paintingnameandartistfields were added in v2.0.0. Thepaintingsandmigrationslists otherwise worked the same way. -
Management was command/keybind driven. There was no unified main menu. The cleanup screens (Unknown paintings, Mismatched paintings, Run a migration) were reached via
/custompaintings manageor an unbound keybind in the Miscellaneous keybinds section, and the rest of the/custompaintingscommand suite (identify,count,fix,move,reassign,remove) handled targeted fixes from chat.